There’s something truly magical about baking. It’s not just about the end result; it’s the process that transforms simple ingredients into something extraordinary. Every time I whip up a batch of Homemade Nutter Butters, I’m reminded of a comforting warmth that envelops me like a favorite sweater on a chilly day. The sweet, nutty aroma wafts through the kitchen, beckoning friends and family to gather around, eager to share in this delightful creation. Each cookie is a little piece of nostalgia, echoing laughter and joy from past gatherings, and trust me when I say, these homemade treats are far superior to their store-bought counterparts. With every bite, you experience a symphony of flavors that dance together—the salty richness of peanut butter balanced with the sweetness of brown sugar, all nestled between two perfectly baked cookies.
As you embark on this culinary adventure, prepare yourself for an experience that goes beyond just satisfying your sweet tooth. This recipe speaks to the heart of what homemade treats should be—comforting, indulgent, and deeply satisfying. As we dive into creating these Homemade Nutter Butters, you’re also engaging in a tradition that many cherish. It’s a celebration of flavors where sweet meets salty in the most delightful way. Whether it’s for sharing with loved ones or enjoying as a personal treat while curling up with your favorite book, these cookies will undoubtedly become a staple in your baking repertoire.
Homemade Nutter Butters: A Sweet Salty Delight
Let’s get started on making these delectable cookies! You’re going to love how simple yet rewarding this process is.
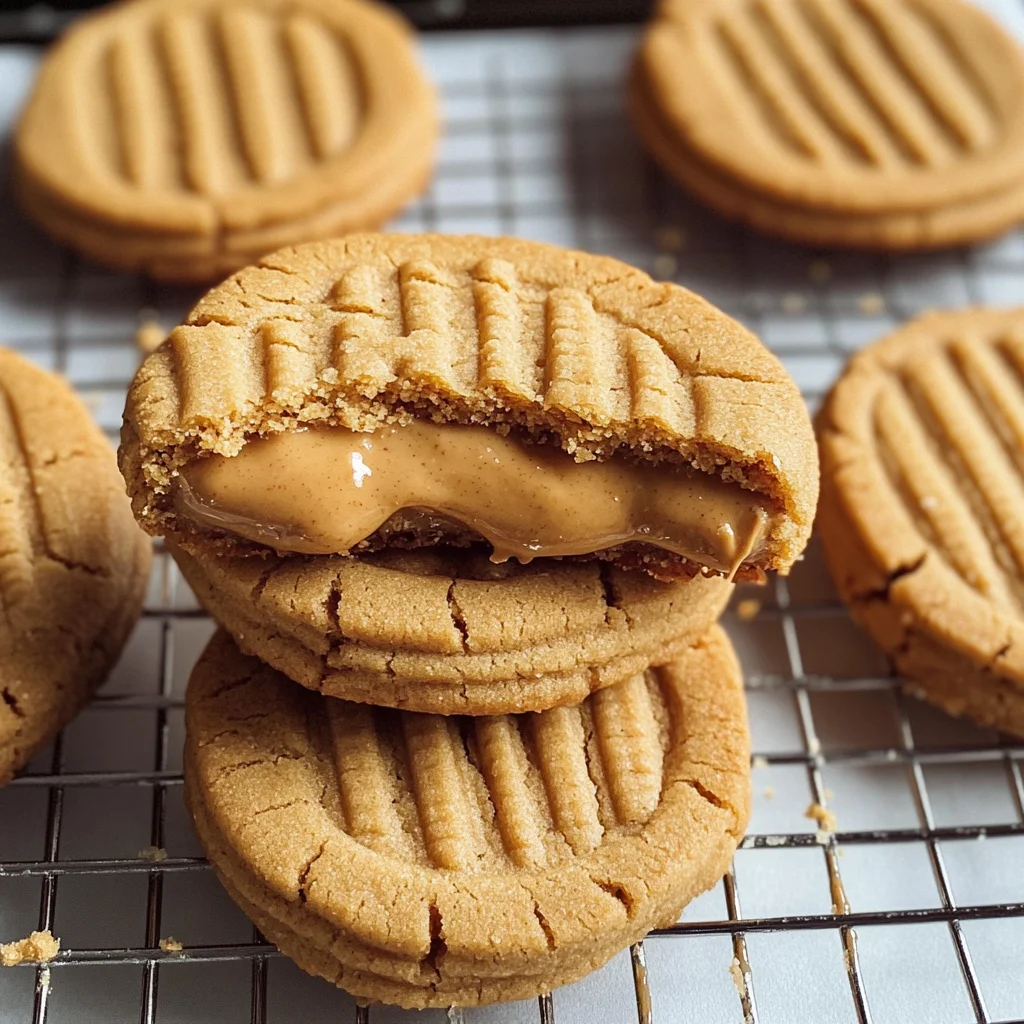
Ingredients:
Before we start creating our delicious Homemade Nutter Butters, let’s take a moment to appreciate each ingredient’s role in this wonderful recipe. Understanding these components will give you insight into why they matter and how they contribute to our cookie’s success.
- 3/4 cup creamy peanut butter. The star of our show! Peanut butter isn’t just an ingredient; it’s the soul of these cookies, delivering that iconic flavor we all crave. I recommend using brands like Jiff or Skippy for their smooth consistency and rich taste—this helps create the perfect texture without any graininess. If you have natural peanut butter on hand, go for it! Just stir it well before measuring to ensure it’s mixed properly.
- 1/4 cup unsalted butter, at room temperature. Butter is crucial for achieving that rich flavor and tender crumb we desire in our cookies. Make sure it’s softened to room temperature so it blends seamlessly with the other ingredients during mixing; this ensures our cookies will be light and fluffy rather than dense or oily.
- 1 cup packed light brown sugar. The deep molasses flavor of brown sugar adds moisture and chewiness to our cookies—it’s not merely sweetening but contributes depth as well. Press it firmly into your measuring cup to get an accurate measurement; we want every bit of that caramel-like goodness!
- 1 large egg, at room temperature. Eggs act as binders in baking; they help hold everything together while adding moisture and richness too. Using an egg at room temperature ensures that it mixes more thoroughly with our other ingredients, promoting better texture throughout.
- 1 teaspoon pure vanilla extract. This ingredient might seem small but trust me—it plays an essential role in elevating the overall flavor profile! Pure vanilla extract gives depth and complexity, enhancing both the sweetness and nuttiness of our cookies.
- 1 cup all-purpose flour. Flour provides structure to our cookies; without it, we’d have a gooey mess instead of delightful treats! Choose high-quality all-purpose flour for consistent results—this will help create that perfect chewy texture we all love.
- 2 tablespoons cornstarch. Here’s where things get interesting! Cornstarch helps create a tender crumb by inhibiting gluten formation when combined with flour—think of it as giving your cookies an extra boost in softness!
- 1/4 teaspoon baking soda. This leavening agent is key for helping our cookies puff up slightly while baking without becoming cake-like—a delicate balance we want to achieve for that perfect bite!
- 1/2 tsp salt. Salt is essential even in sweet recipes! It enhances the flavors and balances out sweetness beautifully—in essence, it helps everything sing together harmoniously.
- 1/2 cup creamy peanut butter (for filling). Yes, we’re doubling down on peanut butter because who could resist? This filling brings that familiar flavor right back into focus between two cookie halves!
- 2/3 cup powdered sugar. Powdered sugar adds sweetness while also making our filling light and airy—no one wants a filling that’s dense or overly sugary!
- 3 – 4 tablespoons heavy cream. This luxurious addition gives our filling its creamy consistency while allowing us to adjust thickness according to preference—more cream means smoother filling!
- 1/2 teaspoon vanilla extract (for filling). Just like earlier, vanilla enhances flavor here too! It ties everything together beautifully ensuring each bite bursts with deliciousness.
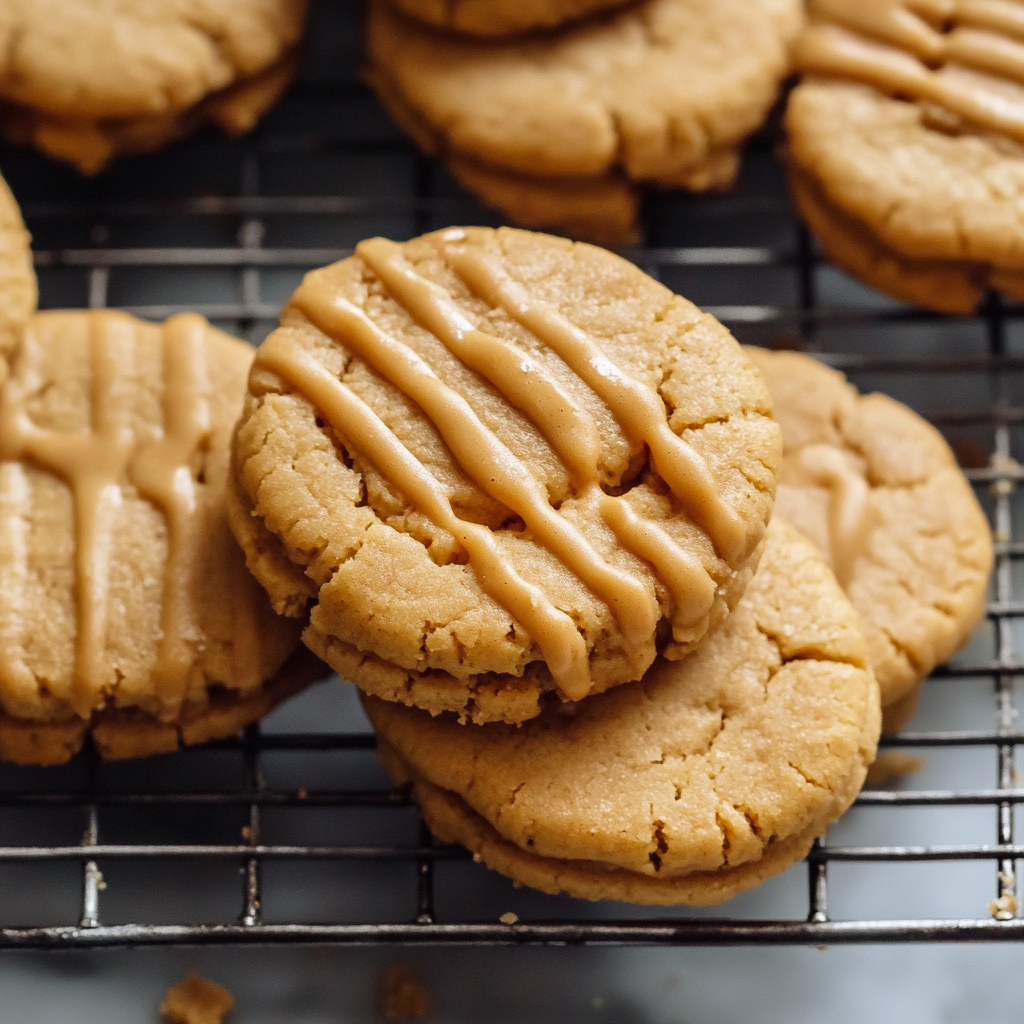
Equipment You’ll Need:
Before diving into our cookie-making journey, let’s make sure we have all the right tools at hand—trust me when I say having good equipment makes everything smoother! These aren’t just tools; they’re partners in creating something wonderful.
- Stand mixer fitted with paddle attachment – This powerhouse tool takes the hard work out of mixing your dough effortlessly! It ensures thorough incorporation of ingredients without straining your arms—a true lifesaver when you’re making larger batches or multiple recipes!
- Silicone spatula – A must-have for scraping down the sides of your mixing bowl ensures nothing gets left behind! It’s also perfect for folding ingredients gently together without deflating mixtures—a non-negotiable companion while working with batters and doughs.
- Cookie scoop (1-ounce) – This nifty little tool helps create uniform cookie sizes so they bake evenly—a small detail but absolutely paramount if you want consistent results across your batch!
- Parchment paper – Lining your baking sheet not only prevents sticking but also makes cleanup effortless afterward—who doesn’t love less mess? Plus, parchment paper helps promote even browning on the bottoms of your cookies too!
Now that we’ve gathered all our ingredients and tools together let’s step into the world where magic happens: preparing those delectable Homemade Nutter Butters!
Step 1: Preheat Your Oven & Prepare Baking Sheets
First things first—let’s get that oven fired up! Preheating it to 350°F ensures even cooking from start to finish; cold ovens can lead to uneven textures which can ruin even the best cookie recipes out there! As it warms up blissfully, line two baking sheets with parchment paper; this creates a non-stick surface that allows easy transfer once baked while also lending itself beautifully toward achieving golden-brown bottoms on each cookie.
Step 2: Creaming Together Key Ingredients
In your stand mixer fitted with its trusty paddle attachment (you’ve got this!), combine the 3/4 cup creamy peanut butter along with 1/4 cup unsalted butter and 1 cup packed light brown sugar at low speed until everything melds harmoniously together—it’s truly magical watching these ingredients transform into luscious creaminess! Gradually increase speed until mixture becomes light and airy after about one minute—that air incorporation is vital here because it’ll lend lovely lift when baking later on! Remember though: scrape down those sides regularly using your silicone spatula—you want every last bit mixed well!
Step 3: Incorporating Egg & Vanilla Extract
Next up goes in one large egg along with one teaspoon pure vanilla extract; beat them into submission until fully incorporated! Eggs serve as binders holding everything together while adding richness throughout—not just binding agents—they’re essential players here so don’t skip or rush this step! Listen closely as you mix—the sound changes subtly as things come together perfectly—it’s music for any baker’s ears!
Step 4: Add Dry Ingredients Carefully
Now comes time for introducing dry elements: sift together one cup all-purpose flour alongside two tablespoons cornstarch (hello tenderness!), one-fourth teaspoon baking soda plus half teaspoon salt directly into wet mixture whilst beating gently at low speed until just combined—that’s right folks—we’re looking for no streaks left behind but be careful here: over-mixing leads us down gummy paths we definitely want to avoid! Once done mixing gently fold them through so they unite beautifully without losing any precious air bubbles previously created during creaming stage earlier—this balance is absolutely paramount if aiming for those classic textured cookies everybody craves!
Stay tuned as we continue crafting these delightful bites—you won’t regret getting lost in this journey filled with warmth and sweetness galore!
Step 5: The Baking Magic Begins
Now that your cookie dough is shaped into adorable little ovals reminiscent of peanuts, it’s time for the transformative magic of baking! Preheat your oven to 350°F, a crucial step that ensures an even bake and allows the cookies to puff and set beautifully. While the oven warms, take a moment to line a baking sheet with parchment paper—this not only prevents sticking but also encourages even browning on the bottom of your cookies. Trust me, those little details make all the difference!
Once everything is prepped, slide your baking sheet into the preheated oven and set a timer for 9 to 10 minutes. This is where the anticipation builds; be sure to peek through that oven door periodically (without opening it, of course!) to witness the delightful transformation as your cookies rise and their edges firm up while maintaining a soft center. Remember not to rush this step; you want that perfect balance of chewy and crispy! When they’re done, they will look slightly puffed up and golden around the edges but still soft in the middle—a visual cue that tells you they are ready. Allow them to cool on the baking sheet for a few minutes before transferring them to a wire rack; this resting period helps them firm up just right without losing their tender texture.
Step 6: Crafting Your Irresistible Filling
While those cookies cool down, let’s whip up that utterly intoxicating peanut butter filling that makes these Homemade Nutter Butters truly extraordinary! Grab your stand mixer again, equipped with the paddle attachment—this tool is essential for achieving that perfectly smooth consistency we all crave in filling. Start by combining ½ cup of creamy peanut butter (think of it as liquid gold in flavor form!), ⅔ cup powdered sugar for sweetness, three tablespoons of heavy cream to create a luxuriously creamy texture, and half a teaspoon of vanilla extract for that aromatic depth.
Beat this concoction on low speed until it comes together into a silky mixture—don’t overmix because if you do, you run the risk of splitting the cream, which can lead to an undesirable grainy texture. If your filling feels too thick (and trust me, some peanut butters can vary), don’t hesitate to add another tablespoon of cream; we want it luscious yet pipeable! Once you’ve achieved that smooth perfection, transfer this ambrosial filling into a piping bag. This tool will allow you to elegantly dispense just the right amount onto those cooled cookie halves, ensuring each bite is filled with joy!
Step 7: The Joyful Sandwiching Process
Now comes one of my favorite parts—the assembly! Matching up your cooled cookies into pairs is not just practical; it’s downright dreamy as you envision how each sandwich will come together. Take one cookie from each pair and gently flip it over so its flat side faces up. Snip off the tip of your piping bag and pipe about two teaspoons’ worth of that velvety filling onto one half. Be generous here; after all, who wants a skimpy sandwich? As you press down with another cookie half on top, feel free to give it a gentle squeeze—this helps distribute that heavenly peanut butter filling evenly between both cookies while ensuring they adhere nicely together.
It’s truly magical watching these components unite into something greater than their individual parts! With each pair you create, take a moment to appreciate how these Homemade Nutter Butters are not just treats but tiny morsels filled with love and nostalgia. Once you’ve completed this step with all your cookies, I guarantee you’ll be tempted to sneak one or two ‘test’ sandwiches—you know, just to ensure everything tastes as good as it looks!
Step 8: The Sweet Finish
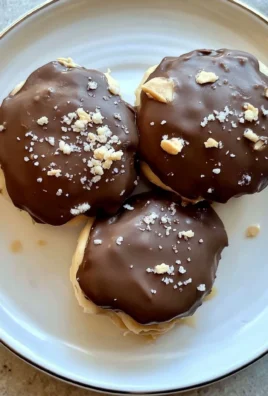
Before diving headfirst into enjoying your Homemade Nutter Butters (trust me—you’ll want to savor every bite!), let’s talk about presentation because what good is an incredible treat without an equally delightful appearance? Arrange your sandwich cookies neatly on a platter or in an airtight container—you could even add a sprinkle of crushed peanuts on top for an added crunch if you’re feeling fancy! It’s these little touches that elevate your dessert from lovely homemade treats to something worthy of sharing at gatherings or special occasions.
If you can manage it (and I wholeheartedly encourage you), allow these beauties to sit for about 30 minutes before indulging. This resting period permits flavors to meld together and creates an even more profound satisfaction when you finally take that first bite. You might think they’re irresistible straight away (and they are!), but giving them just a bit more time enhances their allure tenfold—trust me on this one!
Final Thoughts: Embracing Your Creation
And there you have it—your very own batch of delicious Homemade Nutter Butters! Each cookie embodies love, patience, and creativity—all those ingredients we sometimes forget about in our busy lives. These delightful sandwiches are not just about satisfying cravings; they’re about creating memories around shared experiences with friends and family over simple pleasures like homemade treats. So whether you’re enjoying them solo with a glass of cold almond milk or sharing them at a gathering with laughter echoing around you, I promise they’ll bring joy in every single bite.
I can’t wait for you to try these at home! They’re sure to become a cherished recipe in your kitchen repertoire—one you’ll return to time and again when you’re craving something comforting yet utterly delicious. Happy baking!
Storage and Enjoyment Tips for Your Homemade Nutter Butters
Ah, the moment has arrived! Your kitchen is filled with the irresistible aroma of freshly baked cookies, and I can’t help but feel a surge of excitement as I envision you enjoying these delightful Homemade Nutter Butters. The only question now is: how do we keep that magic alive? Fear not, my friend, because I’ve got you covered with all the tips you need to store these delectable treats for maximum enjoyment.
Storing Leftover Homemade Nutter Butters
To ensure your Homemade Nutter Butters remain just as scrumptious as the day you baked them, you’ll want to store them in an airtight container. This is crucial because it keeps moisture out and prevents those lovely cookies from becoming stale. If you’re like me and love sharing treats, a simple tin or a glass jar works beautifully for gifting or everyday storage. When stored properly, your cookies will stay fresh for about a week at room temperature—though I have a feeling they won’t last that long! For an extra tip, consider placing a slice of bread in the container; it helps maintain moisture levels and keeps those cookies nice and soft. The flavors only deepen after a day or two, creating an even more profound experience with each bite. When you’re ready to indulge again, there’s no need to heat them up; simply pull them out and enjoy that delightful peanut butter goodness!
Freezing Components for Later
Now, if you find yourself with leftovers—or if you’ve made a double batch (which I wholeheartedly encourage!)—freezing these gems is absolutely a fantastic option! To freeze your Homemade Nutter Butters properly, allow them to cool completely before arranging them in a single layer on a baking sheet lined with parchment paper. Once they are frozen solid—about 30 minutes—you can transfer them into an airtight freezer bag or container. They’ll keep beautifully frozen for up to three months! This approach gives you the ultimate convenience: imagine pulling them from the freezer on a whim, letting them defrost on the counter for just a few minutes, and then diving into that creamy filling once again! It’s like having your own little stash of happiness waiting for you whenever you need it.
Homemade Nutter Butters
- Total Time: 30 minutes
- Yield: 24 cookies 1x
Description
Indulge in the delightful world of Homemade Nutter Butters—crispy yet chewy cookies filled with creamy peanut butter goodness. These cookies are not just a treat; they embody nostalgia, warmth, and love, making them perfect for sharing with friends or enjoying during cozy moments at home. With their irresistible sweet-salty flavor combination, these homemade delights far surpass any store-bought counterpart. Whether you’re baking for a gathering or simply satisfying your sweet tooth, this easy recipe will become a staple in your kitchen. Get ready to impress everyone with these scrumptious peanut butter sandwich cookies that promise happiness in every bite!
Ingredients
- 3/4 cup creamy peanut butter
- 1/4 cup unsalted butter, at room temperature
- 1 cup packed light brown sugar
- 1 large egg, at room temperature
- 1 teaspoon pure vanilla extract
- 1 cup all-purpose flour
- 2 tablespoons cornstarch
- 1/4 teaspoon baking soda
- 1/2 teaspoon salt
- 1/2 cup creamy peanut butter (for filling)
- 2/3 cup powdered sugar
- 3 – 4 tablespoons heavy cream
- 1/2 teaspoon vanilla extract (for filling)
Instructions
- Preheat your oven to 350°F and line two baking sheets with parchment paper.
- In a stand mixer fitted with a paddle attachment, combine 3/4 cup creamy peanut butter, 1/4 cup unsalted butter, and 1 cup packed light brown sugar at low speed until combined. Increase speed until light and fluffy.
- Add 1 large egg and 1 teaspoon pure vanilla extract to the mixture and beat until fully incorporated.
- Sift together 1 cup all-purpose flour, 2 tablespoons cornstarch, 1/4 teaspoon baking soda, and 1/2 teaspoon salt, then add to the wet mixture, mixing at low speed until just combined.
- Shape the dough into oval cookies and place them on the prepared baking sheets.
- Bake for 9 to 10 minutes until slightly puffed and golden around the edges. Let them cool for a few minutes before transferring to a wire rack.
- For the filling, combine 1/2 cup creamy peanut butter, 2/3 cup powdered sugar, 3 – 4 tablespoons heavy cream, and 1/2 teaspoon vanilla extract in the stand mixer until smooth.
- Pipe the filling onto the flat side of one cookie, then top with another cookie to create a sandwich.
- Allow the cookies to rest for 30 minutes before serving for enhanced flavor.
- Prep Time: 20 minutes
- Cook Time: 10 minutes
- Category: Dessert
- Method: Baking
- Cuisine: American
Nutrition
- Serving Size: 1 serving
- Calories: 150
- Sugar: 10g
- Sodium: 120mg
- Fat: 7g
- Saturated Fat: 3g
- Unsaturated Fat: 4g
- Trans Fat: 0g
- Carbohydrates: 18g
- Fiber: 1g
- Protein: 3g
- Cholesterol: 15mg
Leave a Comment