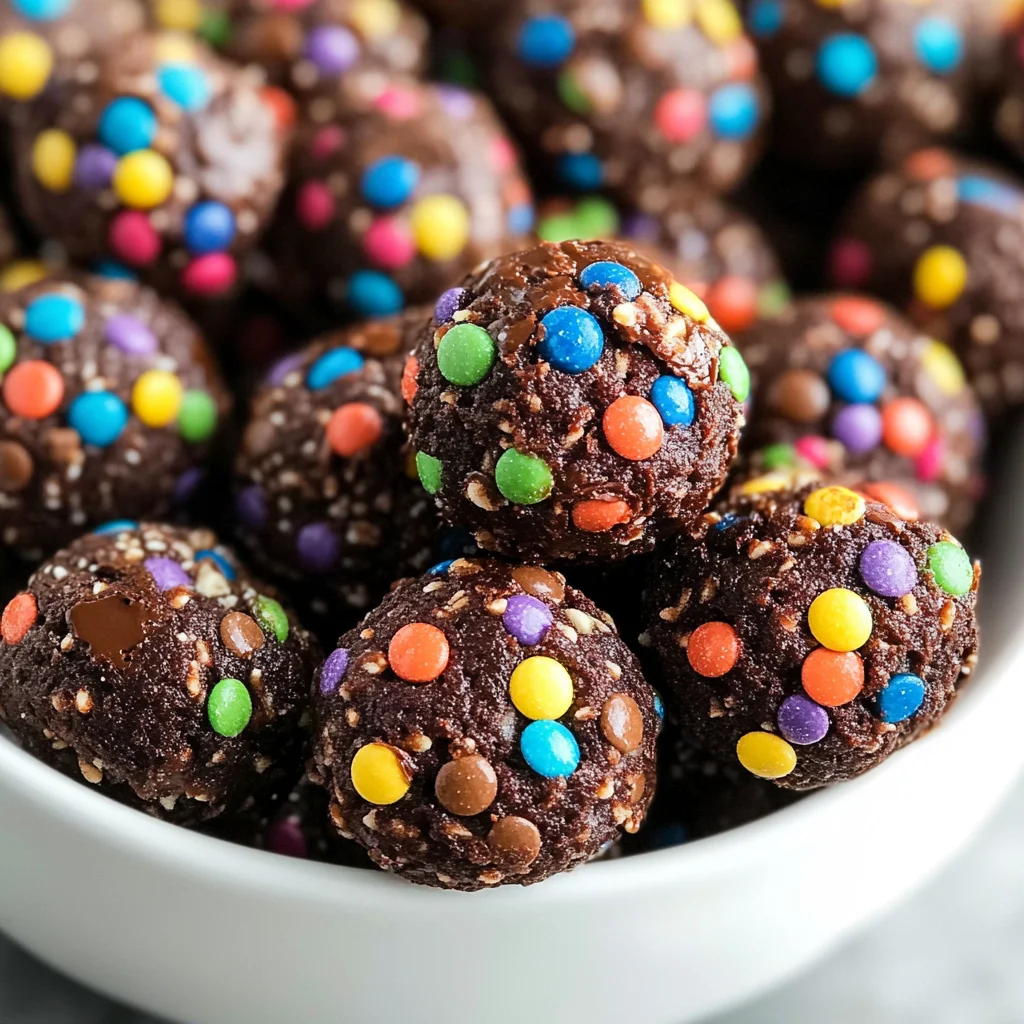
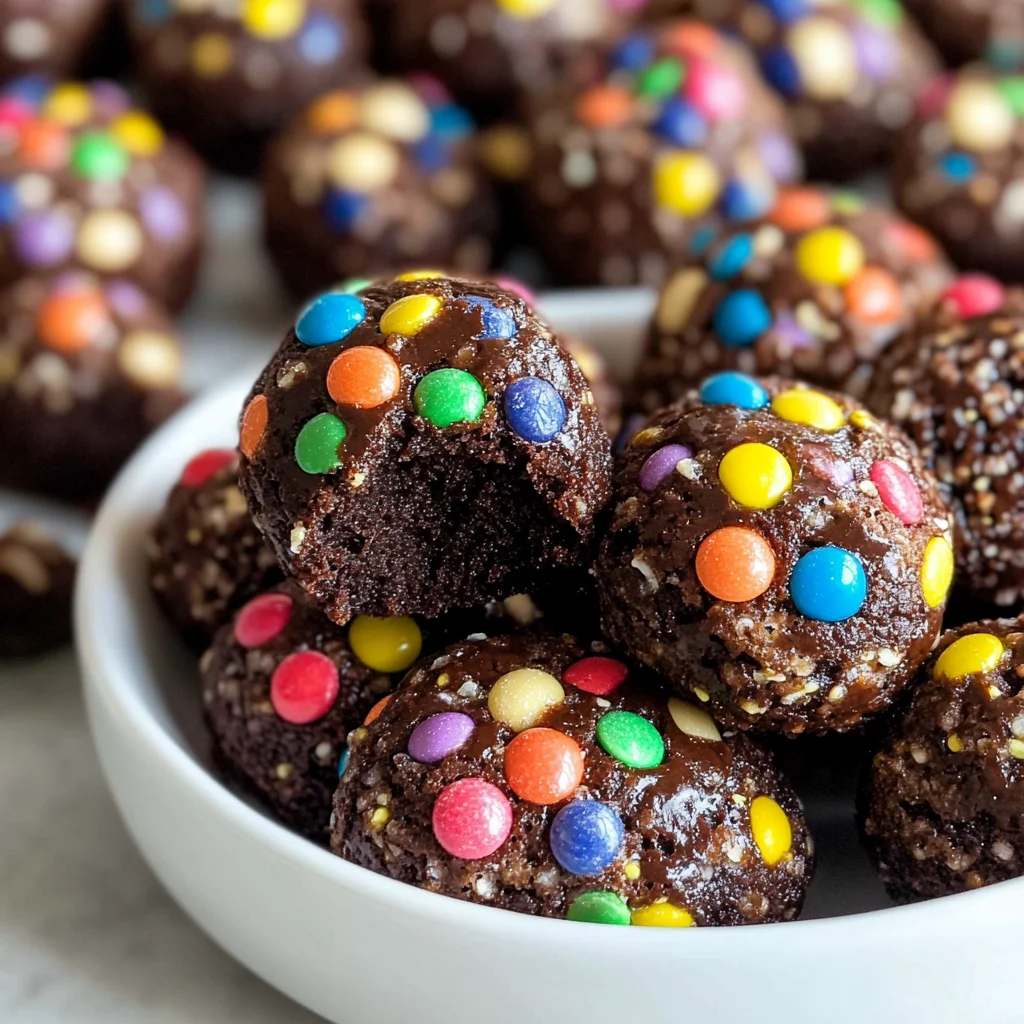
There’s something truly magical about food that transcends mere nourishment; it’s an experience that wraps us in warmth, nostalgia, and joy. As I think of my childhood, I can’t help but reminisce about the delightful treats that would beckon from the pantry, especially those mesmerizing cosmic brownies, each bite a sweet symphony of chocolatey goodness. But what if I told you we could recreate that beloved treat in a healthier form? Yes, my dear friend! These Cosmic Brownie Bites (Healthy & Gluten-Free) are not just a snack; they are a bridge connecting the innocent joy of our youth with the mindful choices we embrace today. With their rich cocoa flavor, chewy texture from medjool dates, and a sprinkle of colorful candy-coated chocolate chips, these bites will ignite your senses and fill your heart with happiness.
Imagine indulging in a treat that is not only delicious but also packed with wholesome ingredients. Each bite is a testament to the power of nature’s bounty—medjool dates serve as the perfect sweetener while simultaneously providing fiber and essential nutrients. The combination of almonds and walnuts offers healthy fats and protein, creating a satisfying treat that fuels both kids and adults alike. This recipe is quick and incredibly easy; in just 10 minutes, you’ll have a batch ready to share or savor all on your own. Trust me when I say this: once you try these Cosmic Brownie Bites, you’ll find it hard to believe they’re vegan, gluten-free, and refined sugar-free!
Cosmic Brownie Bites (Healthy & Gluten-Free): A Wholesome Chocolate Delight
Welcome to this delightful culinary adventure where we transform simple ingredients into something extraordinary! These Cosmic Brownie Bites are not just healthy; they capture the essence of indulgence without guilt. They’re perfect for any time of day—whether as an afternoon pick-me-up or an after-dinner treat that won’t weigh you down.
Ingredients:
As we embark on this delicious journey together, let’s take a moment to appreciate each ingredient. Every single one plays a pivotal role in crafting our cosmic brownie bites.
- 1 and 1/2 cups medjool dates, packed. Medjool dates are truly nature’s candy! Their rich sweetness makes them an ideal base for this recipe; they lend moisture and bind everything together beautifully. When selecting dates, look for those that are plump with a glossy exterior—this indicates freshness. The natural sugars in dates provide energy without the crash of refined sugars; plus, they add fiber which aids digestion. If you’re in a pinch or can’t find medjool dates, you could experiment with other dried fruits like figs or prunes—but keep in mind that their flavor profiles may shift slightly!
- 1 cup almonds. Almonds add a lovely crunch and nutty flavor to our brownie bites while providing healthy fats and protein. When buying almonds, opt for raw or roasted without added salt or flavors—they should be vibrant with no signs of dullness or rancidity. If you have nut allergies or want to switch things up, sunflower seeds could be an excellent alternative that maintains that satisfying texture.
- 1 cup walnuts. Similar to almonds but with their unique earthy flavor, walnuts enhance both taste and nutrition in these bites. They contain omega-3 fatty acids which are great for brain health! Make sure to chop them roughly before adding them to the mix; this allows their nutty essence to blend seamlessly into our dough without overwhelming each bite.
- 1/4 cup shredded coconut. Coconut adds another layer of texture while imparting its tropical sweetness—a glorious contrast against the rich cocoa! Whether you choose unsweetened or sweetened depends on your preference; I personally love unsweetened for its authenticity. Look for finely shredded coconut as it mixes beautifully into our dough without clumping.
- 1/4 cup cocoa powder. Ahh…the star player! Cocoa powder gives our Cosmic Brownie Bites their deep chocolate flavor without all the calories found in traditional brownie recipes. Make sure to use high-quality cocoa powder for the best taste—Dutch-process cocoa offers a smooth richness while natural cocoa has a more intense bitter profile.
- 2 tsp vanilla extract. Vanilla is like a warm hug for your taste buds! It enhances all the flavors and gives depth to our bites—think of it as adding magic dust! Always opt for pure vanilla extract over imitation varieties; you’ll notice the difference immediately.
- 1/4 tsp salt. While this might seem like an unnecessary addition at first glance, salt is absolutely paramount—it elevates flavors and balances sweetness beautifully! A little pinch can transform bland into brilliant.
- 1-2 tbsp maple syrup (only as needed). Maple syrup provides natural sweetness if we need it—it’s optional depending on your taste preference as medjool dates already bring quite a bit of sweetness! If you’re looking for alternatives due to dietary preferences or availability concerns, try agave nectar or honey (if not strictly vegan).
- 1/3 cup candy coated chocolate chips. These colorful gems are what truly make these Cosmic Brownie Bites reminiscent of childhood treats! They add pops of fun sweetness along with visual appeal—who doesn’t love bright colors? Select dairy-free options if you wish to keep everything plant-based here!
Equipment You’ll Need:
Having the right tools at your disposal sets you up for success in any kitchen endeavor—and making our Cosmic Brownie Bites is no exception! While they may not be ingredients themselves, these tools play crucial roles in helping us create something wonderful together.
- Food Processor: This powerful kitchen companion is non-negotiable for this recipe! It not only saves time but ensures all ingredients blend perfectly into that sticky dough we’re aiming for—no lumps allowed here! If you don’t have one handy, consider using a high-powered blender instead; just scrape down the sides often until everything comes together smoothly.
- Spatula: A sturdy spatula helps incorporate those delightful candy-coated chocolate chips into our dough without damaging their shape too much—it’s essential when transferring ingredients from one bowl to another too!
- Measuring Cups/Spoons: Precision matters in baking (and cooking)! Having accurate measurements ensures consistent results every time you whip up these treats—especially important since we’re relying on whole foods rather than processed ingredients here.
Step 1: Blending Magic
To kick off our Cosmic Brownie Bites adventure, gather all your ingredients lovingly laid out before you—the aroma will start drawing people towards your kitchen soon enough! Start by adding those packed medjool dates into your food processor along with almonds, walnuts, shredded coconut, cocoa powder, vanilla extract, and salt—each ingredient playing its part like musicians tuning their instruments before an impressive symphony begins. Now pulse this mixture until it transforms into what looks like crumbly sand—it should clump together when pressed between your fingers; if it doesn’t feel sticky enough yet (don’t worry!), simply drizzle in some maple syrup one tablespoon at a time until it reaches perfection!
Step 2: The Joyous Dough Forming
Once you’ve achieved that glorious sticky consistency full of promise—the next step awaits! Transfer this luscious mixture into a mixing bowl where you’ll fold in those vibrant candy-coated chocolate chips—you want every bite bursting with color and surprise goodness hidden within them! Using clean hands (it’s always more personal this way!), get ready to scoop handfuls of dough and roll them gently into bite-sized balls—about an inch wide should do nicely so they’re easy for little hands or grown-up cravings alike!
Step 3: Chill Out (Optional)
If you’d like your cosmic brownie bites chilled—which intensifies both flavor and texture—now’s the time to pop them into the refrigerator while preparing dinner or simply enjoying some quality family time! Allowing them some time to set helps meld all those beautiful flavors together even more profoundly—a step I promise you won’t regret skipping!
Step 4: Enjoy Your Creations!
Finally—the moment arrives when it’s time to indulge yourself in these scrumptious creations straight from your kitchen! Whether enjoyed fresh out-of-the-mixer blissfully soft or chilled into firm little nuggets—the choice is yours entirely; either way promises satisfaction galore as each bite delivers delight beyond expectations!
As we wrap up this delectable journey together through making Cosmic Brownie Bites (Healthy & Gluten-Free), remember how simple it was yet so profoundly rewarding—we’ve transformed wholesome ingredients into tiny treasures perfect anytime cravings strike! Enjoy sharing them with friends—or keep them tucked away just for yourself because goodness knows we deserve self-care too!
Cosmic Brownie Bites (Healthy & Gluten-Free)
Step 5: Blending the Ingredients into Bliss
Now that you’ve gathered all your ingredients, it’s time to introduce them to each other in a way that creates a wonderfully sticky, cohesive dough. Begin by tossing the medjool dates, almonds, walnuts, shredded coconut, cocoa powder, vanilla extract, and salt into your trusty food processor. This step is absolutely paramount because blending these specific ingredients together not only merges their unique flavors but also harnesses their natural oils and moisture—trust me, this is what will give your Cosmic Brownie Bites that rich, fudgy texture we all crave. Pulse the mixture slowly at first; you want to break down those nuts and dates without turning them into a paste. You’re aiming for a consistency reminiscent of cookie dough—thick enough to hold its shape yet sticky enough to bind together beautifully.
As you blend, take a moment to appreciate the intoxicating aroma wafting through your kitchen; it’s like chocolate heaven! If you notice that your mixture feels crumbly instead of sticky, don’t worry—this can happen if your dates aren’t as moist as they should be. Here’s where the maple syrup comes into play! Drizzle in a tablespoon or two of maple syrup and blend again until everything is fully integrated. The syrup not only adds sweetness but also acts as a magical glue binding your ingredients together. Keep an eye on the texture; you want it firm enough to roll but soft enough to easily mold with your hands. Remember, patience is key here—you want every ingredient to shine through in this symphony of flavors.
Step 6: Incorporating the Rainbow Surprise
Once you have achieved that glorious brownie dough consistency, carefully transfer it into a mixing bowl. This step is where the magic truly begins—adding those colorful candy-coated chocolate chips! There’s something utterly delightful about folding in these vibrant gems; they provide not just sweetness but also a whimsical crunch that contrasts beautifully with the dense brownie base. Using a spatula or even your clean hands, gently mix the chocolate chips into the dough until they are evenly distributed throughout. This is crucial because every bite should be bursting with flavor and texture; no one wants a cosmic brownie bite deprived of its sweet surprise!
As you’re incorporating these chips, take a moment to feel how satisfying it is to create something so deliciously indulgent yet healthy. You’re basically crafting little morsels of joy that can brighten anyone’s day! And remember—the more evenly mixed they are, the better each bite will be when you indulge later. Don’t rush this step; take your time mixing to ensure every particle of goodness gets its fair share of chocolatey bliss.
Step 7: Rolling Into Bite-Sized Bliss
Now comes one of my favorite parts: rolling these delightful creations into bite-sized balls! To begin this step, make sure you have clean hands—after all, we’re creating something meant for sharing and enjoyment! Scoop out about a tablespoon of the dough and roll it between your palms until you form a smooth ball about the size of a golf ball or slightly smaller if you prefer daintier bites. The warmth from your hands helps soften the dough just enough for easy rolling while ensuring that each Cosmic Brownie Bite remains compact and perfectly formed.
While rolling, keep in mind that consistency is key—not too big or too small! Aim for uniformity so everyone gets an equally delightful experience when they pop one of these bites in their mouth. As you’ve rolled each ball, place them onto a parchment-lined baking sheet or plate to set aside for now. It’s important not to overcrowd them; give each bite some personal space so they can breathe! And if any bits of dough stick to your fingers during this process—don’t fret; simply lick them off (you deserve it!) because we both know how delicious this concoction truly tastes!
Step 8: The Transformative Chill
Now, let’s talk about chilling—this crucial step may seem like an inconvenience at first glance, but trust me on this one! Once you’ve rolled all your bites, it’s time to pop them in the refrigerator for at least 30 minutes (although I suggest an hour if you can wait!). Chilling allows flavors to meld together harmoniously and helps solidify those luscious brownie bites into firm morsels ready for snacking perfection.
Why chill? Well, aside from enhancing flavor depth—a phenomenon known as flavor melding—the chilling process also improves texture by making sure each bite holds its shape beautifully when bitten into. Plus, there’s something exquisitely satisfying about enjoying chilled desserts on warm days! Just imagine taking one out after it’s had some time in the fridge—the contrast between coolness and richness will be utterly extraordinary! So resist temptation just a little longer; I promise you’ll be rewarded tenfold once these beauties are ready to devour!
Final Touches
Step 9: Enjoying Your Cosmic Creations!
Finally! After patiently allowing those Cosmic Brownie Bites to chill and firm up nicely in the fridge, it’s time for the grand finale: enjoying them! Carefully remove them from their resting place and arrange them on a lovely serving platter—it’s all about presentation after all! Maybe even sprinkle some extra rainbow candy-coated chocolate chips over them for an added touch of whimsy—they deserve it!
As I take my first bite into one of these decadent little delights filled with wholesome ingredients and playful textures, I can’t help but smile at how satisfying they feel both physically and emotionally. Each bite bursts with rich chocolate flavor balanced perfectly by crunchy nuts and sweet chocolatey surprises throughout—it’s pure bliss! Whether you’re serving these at a gathering or simply indulging after dinner (or breakfast—you do you!), I assure you everyone will adore these healthy cosmic brownie bites.
So there you have it—a deliciously simple recipe that brings joy not just through taste but through love and creativity in cooking. I hope this inspires countless moments around your table with family and friends. Make sure to share these treats with others—because good food is always better when enjoyed together! Happy snacking!
Storage and Enjoyment Tips for Your Cosmic Brownie Bites (Healthy & Gluten-Free)
Now that you’ve whipped up a batch of these delightful Cosmic Brownie Bites, the fun doesn’t stop here! Whether you’re savoring them right away or tucking some away for later enjoyment, there’s a world of delicious possibilities. These bites are not just a treat; they’re a wholesome snack that can brighten your day at any moment. So let’s dive into how to keep them fresh and ready for whenever those cravings sneak up on you!
Storing Leftover Cosmic Brownie Bites (Healthy & Gluten-Free)
To keep your Cosmic Brownie Bites in tip-top shape, I recommend placing them in an airtight container—this is crucial to prevent them from drying out. A glass jar works wonderfully, as it not only seals in freshness but also adds a touch of charm to your kitchen countertop. Store them in the refrigerator, where they’ll stay deliciously fresh for about a week. If you find that they become a bit firmer during storage, don’t fret! Just let them sit at room temperature for a few minutes before indulging again; they soften beautifully and regain their chewy texture. Here’s a little pro tip: placing a slice of bread inside the container can work wonders by keeping the bites moist! Imagine pulling one out after a few days and being greeted with that irresistible aroma of chocolate—it’s simply heavenly.
Freezing Cosmic Brownie Bites for Later
For those moments when you want to prepare ahead or simply save some for another time, freezing these brownie bites is an excellent option! Start by lining a baking sheet with parchment paper and placing your rolled bites on it in a single layer; this prevents them from sticking together. Pop the tray in the freezer until they’re firm (about an hour), then transfer them to an airtight freezer bag or container for long-term storage. Properly frozen, these little gems can last up to three months while maintaining their delightful taste and texture. When you’re ready to enjoy one (or several!), just pull out what you need and let them thaw at room temperature for about 10-15 minutes; trust me, there’s nothing quite like biting into a soft, chocolatey treat whenever the craving strikes! The convenience factor here is absolutely paramount—just imagine having this healthy indulgence waiting for you whenever you need a sweet pick-me-up.

Cosmic Brownie Bites (Healthy & Gluten-Free)
- Total Time: 10 minutes
- Yield: About 12 bites 1x
Description
Cosmic Brownie Bites (Healthy & Gluten-Free) offer a nostalgic twist on a classic treat, combining wholesome ingredients to create a deliciously indulgent yet guilt-free snack. These no-bake bites are perfect for satisfying your sweet tooth while providing nutritious benefits. Packed with medjool dates for natural sweetness, crunchy almonds and walnuts for healthy fats, and rich cocoa powder for that decadent chocolate flavor, these treats are ideal for adults and kids alike. The addition of colorful candy-coated chocolate chips brings joy to every bite, making these Cosmic Brownie Bites not only delightful but also visually appealing. Ready in just 10 minutes, they’re the perfect quick snack or dessert option that you can whip up in no time!
Ingredients
- 1 and 1/2 cups medjool dates
- 1 cup almonds
- 1 cup walnuts
- 1/4 cup shredded coconut
- 1/4 cup cocoa powder
- 2 tsp vanilla extract
- 1/4 tsp salt
- 1/3 cup candy-coated chocolate chips
Instructions
- In a food processor, combine medjool dates, almonds, walnuts, shredded coconut, cocoa powder, vanilla extract, and salt. Pulse until the mixture resembles crumbly sand and holds together when pressed.
- If needed, add maple syrup one tablespoon at a time until desired consistency is reached.
- Transfer the mixture to a bowl and fold in candy-coated chocolate chips.
- Roll the mixture into bite-sized balls (about one inch wide) and place them on a parchment-lined tray.
- Chill in the refrigerator for at least 30 minutes before enjoying.
- Prep Time: 10 minutes
- Cook Time: 0 minutes
- Category: Dessert
- Method: No-bake
- Cuisine: American
Nutrition
- Serving Size: 1 bite (30g)
- Calories: 120
- Sugar: 8g
- Sodium: 5mg
- Fat: 6g
- Saturated Fat: 0.5g
- Unsaturated Fat: 5g
- Trans Fat: 0g
- Carbohydrates: 16g
- Fiber: 3g
- Protein: 2g
- Cholesterol: 0mg

Leave a Comment