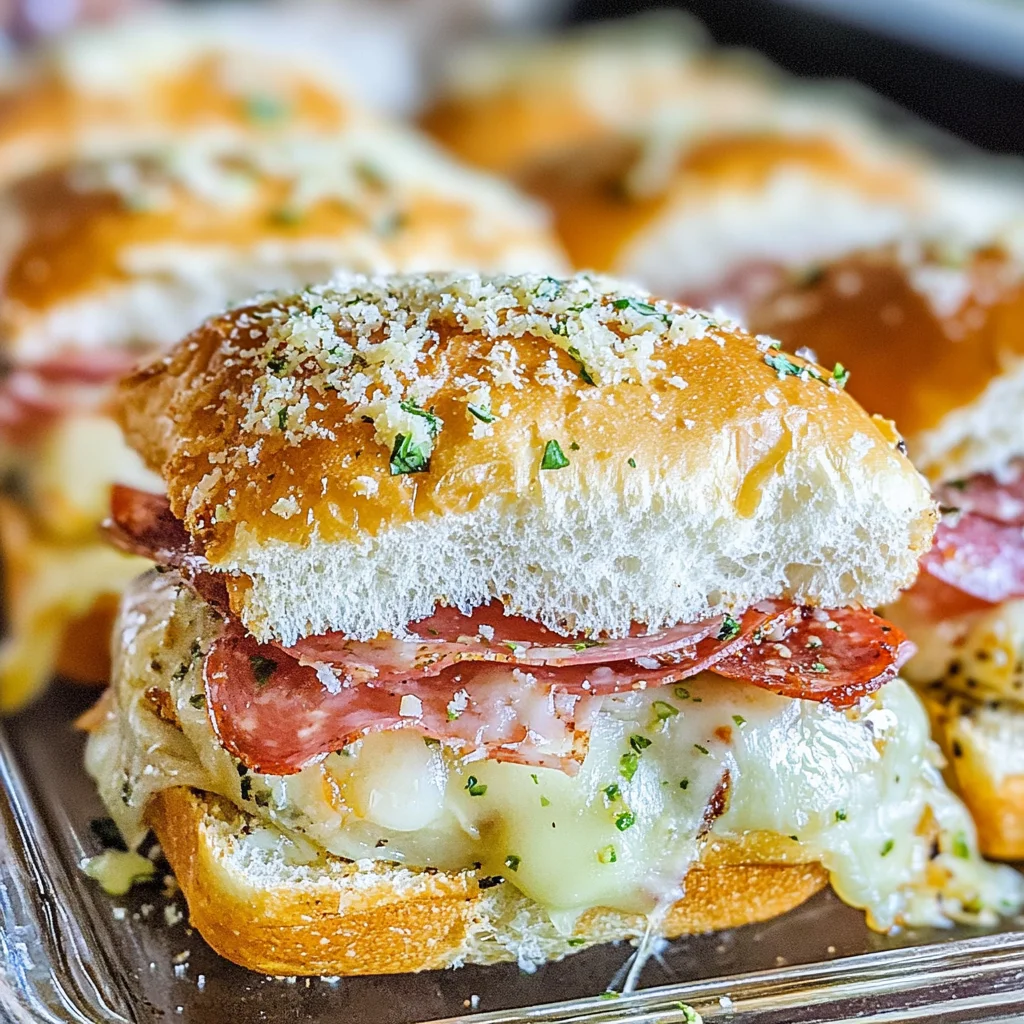
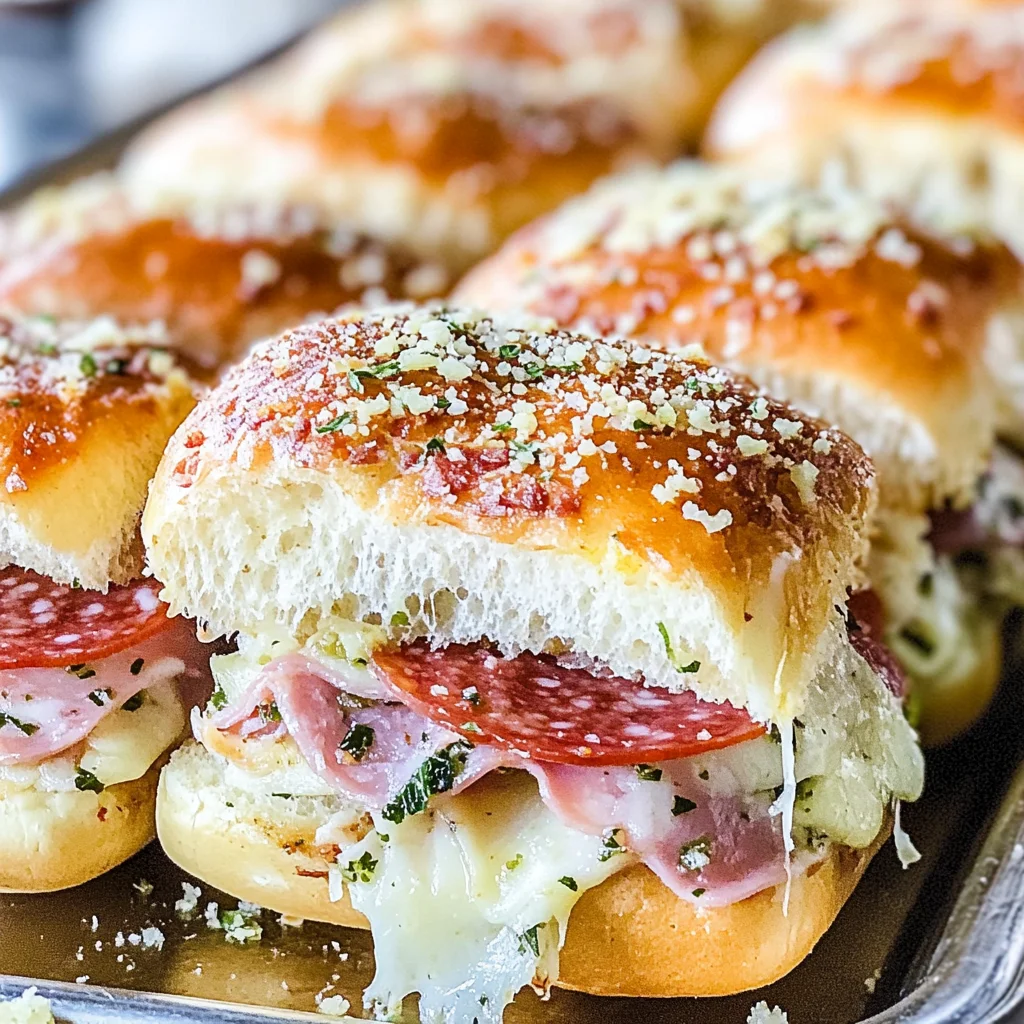
As I sit here, the aroma of freshly baked bread wafting through my kitchen, I can’t help but think about how food is so much more than just sustenance. It’s an experience, a memory in the making, and a bridge between generations and cultures. Today, I’m thrilled to share with you my beloved recipe for Italian Grinder Sliders. These delightful mini sandwiches are packed with layers of flavor, featuring savory deli meats, gooey melted cheese, and a luscious garlic parmesan glaze. With every bite, you’ll feel the warmth of Italian tradition infused with a modern twist that makes these sliders utterly irresistible.
Imagine gathering around the table with friends or family, laughter filling the air as you savor these delectable bites together. The playful nature of sliders makes them perfect for any occasion—be it a cozy dinner at home or a lively gathering with friends. As the cheese melts and mingles with the rich flavors of turkey pepperoni and chicken ham, it creates a symphony of tastes that will leave everyone asking for seconds (or thirds!). Trust me when I say that once you make these Italian Grinder Sliders, they will quickly become your go-to dish for creating joyful memories around the dinner table.
Italian Grinder Sliders: A Delightful Bite-Sized Feast
Let’s dive right into this delightful recipe! Italian Grinder Sliders are not just another sandwich; they’re an experience packed into a bite-sized treat that’s utterly satisfying. The combination of tender rolls filled with savory ingredients will make your taste buds sing. I promise you’ll find yourself reaching for more as soon as they’re out of the oven!
Ingredients:
Before we embark on this culinary journey, let’s gather our ingredients! Each one plays a crucial role in creating those mouthwatering sliders we’ll be indulging in soon.
- 12 Hawaiian rolls. These little gems are soft and sweet, providing the perfect base for our sliders. Their fluffy texture allows them to soak up all the delicious juices without falling apart—a non-negotiable quality when it comes to sliders! Look for rolls that are fresh and slightly golden on top; they should have a light sweetness that beautifully balances out the savory elements of the fillings.
- 8 ounces chicken ham (thinly sliced). This ingredient adds richness and depth to our sliders while keeping everything light and delightful. Chicken ham is wonderfully versatile; its mild flavor allows it to play nicely with other ingredients while providing that essential protein punch. If you’re unable to find chicken ham, don’t hesitate to substitute it with another deli meat like turkey or roast beef—just ensure it’s thinly sliced for optimal layering!
- 4 ounces provolone cheese (sliced). Ahh, provolone—the creamy goodness that stretches deliciously when melted! Provolone brings a slight tanginess that complements our savory meats perfectly. When selecting cheese, always aim for high-quality slices from your local deli; pre-packaged cheeses often lack flavor and freshness compared to their freshly sliced counterparts.
- 3 ounces thinly sliced turkey pepperoni. A favorite in many households, turkey pepperoni adds a spicy kick that elevates our sliders to new heights! Its robust flavor profile turns up the heat just enough without overwhelming the palate. If you prefer something milder, feel free to switch it out for regular turkey slices—but trust me on this one: turkey pepperoni is where it’s at!
- 3 ounces thinly sliced turkey slices. This ingredient adds another layer of deliciousness while keeping things light and flavorful. Turkey is known for its lean protein content—making these sliders not only tasty but also guilt-free! Choose high-quality deli turkey or roast your own at home; either way, ensure it’s sliced thinly so it melds seamlessly within our slider masterpiece.
- 2 tablespoons butter. This liquid gold is essential for creating that beautiful garlic parmesan glaze which tops our sliders—trust me; this step is absolutely paramount! Butter adds richness and moisture while helping everything crisp up beautifully in the oven. Use unsalted butter whenever possible so you can control the salt levels throughout your dish.
- 2 tablespoons grated parmesan. Can we take a moment to appreciate parmesan? This aged cheese brings an umami punch that elevates every bite into something truly extraordinary! Opt for freshly grated parmesan if you can; its flavor is far superior to pre-grated options found in stores.
- 1/2 teaspoon garlic powder. Garlic powder adds an aromatic zest that harmonizes perfectly with our buttery topping—it’s like adding sunshine to your dish! I adore using garlic powder because it integrates smoothly into recipes without needing any additional prep time like fresh garlic would require.
- 1/4 teaspoon salt. Salt enhances flavors across all dishes—it’s like magic seasoning! A small pinch helps balance out sweetness from both the rolls and meats while enhancing overall flavors.
- 8 ounces shredded lettuce. Fresh greens add crunch and brightness against all those rich flavors—this contrast is what makes each slider so enjoyable! Opting for shredded lettuce ensures easy assembly and an even distribution throughout each bite.
- 1/2 cup diced tomato. Juicy tomatoes lend freshness and acidity which cuts through heavier ingredients beautifully—think of them as nature’s confetti! Always choose ripe tomatoes; their natural sweetness will elevate your grinder salad beyond belief!
- 1/2 cup sliced pepperoncini peppers. These tangy little gems introduce both heat and acidity—a delightful surprise in every slider bite! If you’re unsure about their spice level (they range from mild to hot), start by adding less; you can always adjust according to personal preference later!
- 1/4 cup mayonnaise. Mayonnaise acts as an excellent base for our dressing; its creamy texture brings everything together while adding richness without being overpowering—a truly harmonious addition!
- 1 tablespoon apple cider vinegar. This ingredient contributes acidity which cuts through richness beautifully—I promise you’ll appreciate its brightening effect on this dish! Feel free to swap in lemon juice if desired—the goal here is balance!
- 1 teaspoon Italian seasoning. A blend of herbs like oregano, basil, thyme—this spice mix captures all those quintessential Italian flavors we crave in each bite!
- 1/2 teaspoon salt & 1/2 teaspoon pepper (each). Both seasonings are essential companions—they elevate simple dishes into profound masterpieces by enhancing every single flavor note present within our grinder salad dressing!
- 1/2 teaspoon garlic powder (again)—because there’s never too much garlic when making something delicious!
Equipment You’ll Need:
Before we get cooking, let’s make sure we have all the right tools ready at hand! Having quality equipment not only streamlines your cooking process but also ensures fantastic results every time—you wouldn’t want anything less than perfection now would you?
- Baking dish – This sturdy companion will hold all those glorious Hawaiian rolls nestled together as they bake away into golden perfection! Aim for one that’s large enough to fit all twelve rolls comfortably; avoiding overcrowding ensures even cooking throughout.
- Sharp knife – A good sharp knife will save so much time when slicing through buns or cutting sandwiches apart after assembly! Dull knives lead to frustration—not what we want during such joyous moments spent creating delicious food together!
- Whisk – Perfect for blending dressings effortlessly—don’t underestimate how quickly this handy tool makes light work of combining ingredients until smooth & creamy!
- Mixing bowls – You’ll need at least two medium-sized bowls: one dedicated solely for preparing your slider salad dressing & another reserved strictly for tossing lettuce & veggies together later on during assembly.
Now that we have everything gathered together let’s dive into preparing those scrumptious Italian Grinder Sliders step by step!
Step 1: Preheat Your Oven
The first step is vital because we want everything ready before sliding these beauties into their warm home—the oven should be preheated at 350˚F (175˚C). This temperature allows cheese melts beautifully while ensuring bread gets crispy without burning—perfect harmony achieved only through patience here! So go ahead & set your oven timer before moving onto prepping those lovely Hawaiian rolls next!
Step 2: Cut Your Rolls Horizontally
Once preheating begins working its magic inside your oven space—it’s time to grab those Hawaiian rolls & slice them horizontally down their center gently using your sharp knife mentioned earlier on! Carefully laying down just half onto baking dish creates an inviting foundation upon which layers upon layers of goodness shall unfold shortly thereafter! Be cautious not too rush this step since uneven cuts may lead towards mismatched sandwich sizes later on during serving time—nobody enjoys awkward portions when sharing food amongst friends… am I right?
Step 3: Layer On Your Ingredients
Now comes my favorite part: layering our ingredients above those glorious roll bottoms laid patiently waiting below us—they’ve been incredibly patient thus far after all! Start by placing provolone cheese evenly across each bottom half before following closely behind with chicken ham layered smoothly atop followed by both turkey pepperoni & turkey slices added generously next overtop those previous layers already established underneath them—all contributing towards building rich flavors waiting eagerly inside every single bite yet-to-be-tasted ahead!
Step 4: Prepare That Garlic Parmesan Glaze
While assembling continues unfolding beautifully above us—let’s hop back over towards mixing bowl containing melted butter previously set aside earlier alongside grated parmesan along with both garlic powder & salt added generously next into mixture as well now too—we want everything thoroughly combined until fully blended together resembling creamy sauce-like consistency creating absolute bliss once drizzled atop freshly assembled sandwiches below momentarily ahead soon… don’t rush this step either please folks… patience pays off big time here!!
With these steps well underway—you’re officially on track towards making some truly unforgettable Italian Grinder Sliders today!! Let me know how yours turn out—I can’t wait to hear about all those happy faces gathered around enjoying what you’ve created!!
Step 5: Whip Up the Irresistible Grinder Salad
Now that your glorious sliders are in the oven, it’s time to create the vibrant grinder salad, which is absolutely paramount for taking these Italian Grinder Sliders to the next level! This dressing is a symphony of zesty and creamy, combining mayonnaise with apple cider vinegar, Italian seasoning, salt, pepper, and just a hint of garlic powder. You might be wondering, why this particular combination? Well, the acidity from the vinegar cuts through the richness of the meats and cheese, providing a refreshing contrast that keeps every bite balanced and exciting. So grab a medium-sized bowl and whisk together 1/4 cup of mayonnaise with 1 tablespoon of apple cider vinegar. This not only brings in a delightful tang but also helps to meld all flavors beautifully.
Once you’ve whisked those ingredients together until they’re smooth and luscious—think liquid gold—you’ll want to season it with 1 teaspoon of Italian seasoning, 1/2 teaspoon salt, 1/2 teaspoon pepper, and another pinch of garlic powder. This is where you can let your taste buds guide you; feel free to adjust these measurements slightly if you adore certain flavors more than others! The goal here is to create a dressing that feels both indulgent and light—a true celebration of flavors. Now set this mixture aside for a moment while we prepare our salad components. Toss together shredded lettuce (a generous handful will do), diced tomatoes (about half a cup), and those delightful sliced pepperoncini peppers. These ingredients add crunch, sweetness, and just the right amount of heat. Once everything is mixed well with that divine dressing—trust me on this—it transforms what could have been an ordinary side into something truly extraordinary!
Step 6: Assembly Time – Building Your Flavorful Masterpiece
With your grinder salad prepped and your sliders baking beautifully in the oven (savoring that aroma wafting through your kitchen yet?), it’s time to assemble these mouthwatering Italian Grinder Sliders! Carefully monitor your sliders as they bake; you’re looking for that perfect golden brown top—a color that signals crispy perfection! Once they reach this point after about 15-20 minutes, remove them from the oven with caution; I know it’s tempting to dig right in, but patience will reward you immensely.
Gently take off the tops of those warm sliders—be careful not to pull them apart too roughly—and behold the melty goodness beneath! You should see gooey provolone cheese hugging layers of chicken ham, turkey pepperoni, and turkey slices. The aroma alone is enough to make anyone weak at the knees! Now comes one of my favorite moments: using a spoon or spatula, generously pile on that gorgeous grinder salad onto each slider’s bottom half. Be sure to distribute it evenly so every bite packs a flavorful punch. Once you’ve added a healthy scoop atop each slider base, carefully place those lovely tops back on. This layering technique ensures that each bite delivers an explosion of flavor while maintaining structural integrity—because nobody wants their beloved sliders falling apart!
Step 7: The Finishing Touch – A Glorious Bake
Now that we’ve assembled our sliders packed full with deliciousness, it’s time for one final trip back into that warm embrace of your oven! Preheat it again briefly if needed (you want it hot enough to melt everything together without overcooking). Pop those beauties back in for about five more minutes—just enough time for everything to get cozy together while ensuring that creamy goodness melds into every layer underneath.
During this short but powerful bake-off—the critical last step—keep an eye on them because visual cues matter immensely here! You’re looking for a bubbly effect around the edges as well as any cheese that’s starting to ooze joyfully out from between the rolls. When done properly, you’ll experience that utterly intoxicating smell wafting toward you once again—the kind that beckons friends and family alike to gather around the table in eager anticipation.
Step 8: Serve Up Your Italian Grinder Sliders
You did it! Your hard work has paid off beautifully; these Italian Grinder Sliders are ready for their grand debut. As you pull them out from the oven one last time—allowing yourself just a moment longer to appreciate how incredible they look—let’s talk about serving them up right. Place them on a charming platter or wooden board; presentation matters because we eat with our eyes first!
Slice through those sliders carefully if you haven’t already done so during assembly—this makes serving easier while allowing everyone to dive into their own piece of paradise without hassle. With each slice revealing layers upon layers of flavor-packed goodness nestled within those fluffy Hawaiian rolls topped with garlic Parmesan glaze—it’s nothing short of culinary artistry!
As you serve these up alongside any extra grinder salad or dipping sauce you’d like (I recommend keeping some extra mayo on hand), watch how guests’ faces light up as they take their first bites. Trust me when I say this: Italian Grinder Sliders are not just food; they’re an experience meant to bring people together around tables filled with laughter and love!
So there you have it—your very own recipe for Italian Grinder Sliders that embodies warmth and delight in every single bite. Now go ahead and share these beauties with your loved ones; I promise they’ll be asking for seconds before they even finish their first!
Storage and Enjoyment Tips for Your Italian Grinder Sliders
Now that you’ve crafted these mouthwatering Italian Grinder Sliders, it’s time to dive into the delightful world of enjoying them! But wait—what if you have some leftovers? Trust me, these little beauties are not just a one-time treat. They’re perfect for meal prep, late-night snacks, or even lunchbox surprises for the kids. So let’s talk about how to keep that incredible taste alive!
Storing Leftover Italian Grinder Sliders
To ensure your leftover Italian Grinder Sliders stay as scrumptious as they were when they first came out of the oven, it’s essential to store them correctly. First off, grab an airtight container; this is crucial because it locks in moisture and flavor while keeping those sliders from getting too soggy or dried out. Pop them in the fridge, where they’ll happily live for about 3-4 days. If you’re anything like me, I sometimes place a paper towel at the bottom of the container to absorb excess moisture—this little trick keeps the bread fresh and fluffy! Now, let’s be real: while these sliders are truly extraordinary right after baking, they still taste delicious after storage. Just give them a quick reheat in the oven or microwave before serving again to revive that gooey cheese and warm filling. You’ll be amazed at how good they still are!
Freezing Italian Grinder Sliders for Later
If you want to take your meal prep game to another level, consider freezing some of those glorious Italian Grinder Sliders! To freeze them properly, wrap each slider individually in plastic wrap and then seal them in a freezer-safe bag or container—this helps prevent freezer burn and keeps all those flavors locked in tight. They can be frozen for up to 2 months without losing their charm! When you’re ready to indulge again, simply remove the desired number of sliders from the freezer, let them thaw in the fridge overnight, and then reheat them in the oven until they’re warm and melty. This option is fantastic because it gives you a quick meal solution on busy days while still delivering that homemade goodness you crave. It’s convenience wrapped up in pure deliciousness!

Italian Grinder Sliders
- Total Time: 35 minutes
- Yield: Serves approximately 6 (2 sliders each) 1x
Description
Italian Grinder Sliders are the ultimate bite-sized delight that combines layers of savory turkey, gooey provolone cheese, and a luscious garlic parmesan glaze, all nestled between soft Hawaiian rolls. These mini sandwiches are perfect for any occasion—whether it’s a family dinner, game day, or a casual get-together with friends. With every bite, you’ll experience a burst of Italian-inspired flavors that will keep everyone coming back for more. Easy to prepare and completely customizable, these sliders promise to become a beloved addition to your recipe repertoire.
Ingredients
- 12 Hawaiian rolls
- 8 ounces thinly sliced chicken ham (or deli turkey/roast beef)
- 4 ounces sliced provolone cheese
- 3 ounces thinly sliced turkey pepperoni
- 3 ounces thinly sliced turkey slices
- 2 tablespoons unsalted butter
- 2 tablespoons grated parmesan cheese
- 1/2 teaspoon garlic powder
- Salt and pepper to taste
- Fresh shredded lettuce
- Diced tomatoes
- Sliced pepperoncini peppers
Instructions
- Preheat your oven to 350°F (175°C).
- Slice the Hawaiian rolls in half horizontally and place the bottom halves in a baking dish.
- Layer the provolone cheese, chicken ham, turkey pepperoni, and turkey slices on the bottom halves.
- In a small bowl, mix melted butter with grated parmesan, garlic powder, and salt. Drizzle this mixture over the assembled sliders.
- Bake for 15-20 minutes until the tops are golden brown and cheese is melted.
- While baking, prepare a salad with shredded lettuce, diced tomatoes, sliced pepperoncini peppers, mayonnaise mixed with apple cider vinegar, Italian seasoning, salt, and pepper.
- Once sliders are done baking, remove from the oven and add the prepared salad on top before placing the slider tops back on.
- Prep Time: 15 minutes
- Cook Time: 20 minutes
- Category: Main
- Method: Baking
- Cuisine: Italian
Nutrition
- Serving Size: 1 slider (approx. 85g)
- Calories: 280
- Sugar: 4g
- Sodium: 640mg
- Fat: 14g
- Saturated Fat: 7g
- Unsaturated Fat: 6g
- Trans Fat: 0g
- Carbohydrates: 28g
- Fiber: 1g
- Protein: 12g
- Cholesterol: 40mg


Leave a Comment