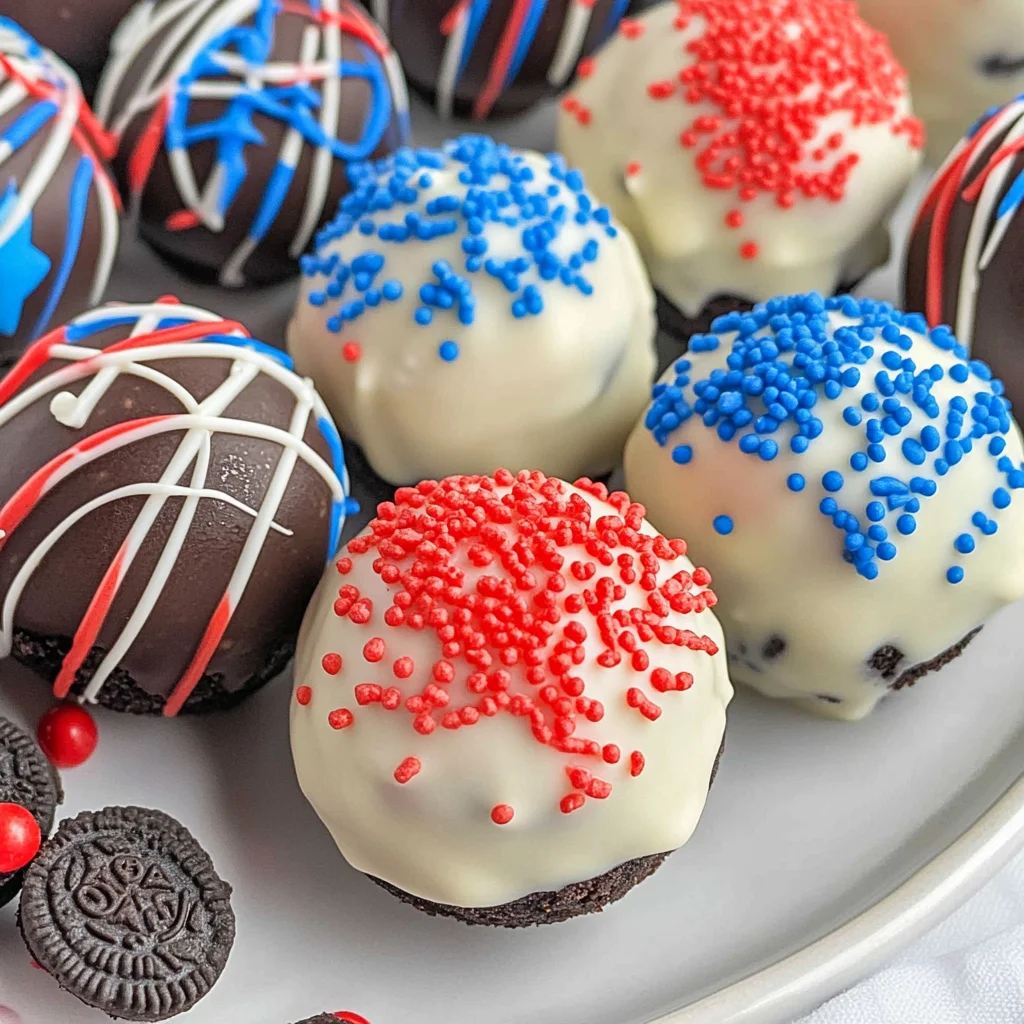
There’s something undeniably magical about creating festive treats that not only taste incredible but also carry the essence of celebration. With every bite of these Red White and Blue Oreo Balls, you’ll find a delightful blend of nostalgia and joy that brings people together. Picture this: the smooth, creamy center made from crushed Oreos and rich cream cheese, enveloped in a glossy layer of white chocolate, and adorned with vibrant red and blue drizzles. These no-bake delights are not just desserts; they’re little bites of happiness that can light up any gathering! Whether it’s the Fourth of July, Memorial Day, or simply a summer get-together with friends, these treats will surely capture hearts and satisfy sweet cravings.
As we embark on this journey together to make these Red White and Blue Oreo Balls, it’s essential to remember that food often serves as more than just sustenance—it connects us to our loved ones and memories. I’ve always been captivated by how certain dishes evoke warmth and comfort, reminding me of family celebrations filled with laughter. And trust me when I say that watching your friends’ faces light up as they take their first bite is a profoundly satisfying experience that makes all the effort worthwhile. I promise you; once you master this recipe, it will become a cherished go-to for every festive occasion!

Ingredients:
Let’s gather our ingredients for this delightful culinary adventure! Each component plays a pivotal role in creating those irresistibly tasty Red White and Blue Oreo Balls.
- 36 Oreo cookies (from 1 pound 3 ounce package). These beloved chocolate sandwich cookies bring not only flavor but also texture to our dessert. Their unique combination of crispiness from the outer cookie and creaminess from the filling creates an irresistible base for our truffles. When choosing Oreos, don’t hesitate to opt for classic flavors; their deep cocoa notes are simply non-negotiable in achieving that rich taste we’re aiming for. If you’re feeling adventurous, you could even experiment with different flavored Oreos—imagine using mint or peanut butter varieties!
- 8 ounces cream cheese (softened). This ingredient is crucial because it binds everything together while adding a luscious creaminess that balances out the sweetness of the cookies. Make sure your cream cheese is softened to room temperature—this is absolutely paramount for easy mixing! If it’s too cold, you’ll struggle to combine it smoothly with the cookie crumbs; if it’s too warm, your mixture might become too runny. For those who may want a dairy-free alternative, there are fantastic vegan cream cheeses available that work beautifully in this recipe.
- 1 pound white almond bark. This coating not only provides a sweet contrast but also gives our Oreo balls that lovely sheen that makes them so visually appealing. Almond bark is an excellent choice because it melts easily and sets up firmly without requiring tempering like traditional chocolate does—so no need to stress over complicated techniques here! When melting almond bark, keep an eye on it to avoid scorching; stirring frequently will help ensure a silky-smooth consistency.
- 6 ounces red candy melts. These vibrant melts will add a playful touch to our oreo balls while contributing an extra layer of sweetness that harmonizes beautifully with the chocolate coating beneath. They melt down quickly in the microwave or over a double boiler; just be sure not to overheat them as they can seize up if left unchecked! You could also use red food coloring if candy melts aren’t available—just mix it into some melted white chocolate for similar effects.
- 6 ounces blue candy melts. Just like their red counterparts, these blue candy melts bring color and fun to our festive dessert! They pair perfectly with red for a striking patriotic presentation that’s sure to impress at any gathering. Again, be mindful while melting them—watch for those little bits left unmelted at the bottom of your bowl; stir until fully melted before using.
- Sprinkles. Last but definitely not least, sprinkles add that final touch of whimsy and festivity! Not only do they bring visual appeal with their pops of color, but they also provide a delightful crunch against the smoothness of the truffles. Feel free to choose sprinkles in stars or other patriotic shapes for an extra festive flair!
Equipment You’ll Need:
Now that we have our ingredients lined up like eager participants in this delicious dance, let’s talk about equipment! Having the right tools makes every step smoother and more enjoyable—trust me on this one!
- Parchment paper – This simple kitchen staple is essential for lining your baking sheet as it prevents sticking while allowing easy cleanup afterward. It creates a non-stick surface where your beautifully crafted Oreo balls can set without fussing over residues or messes.
- Food processor or rolling pin & resealable bag – A food processor is an absolute gem when it comes to crushing those Oreo cookies into fine crumbs effortlessly! However, if you don’t have one handy (or just enjoy a bit of hands-on work), placing your cookies in a resealable bag and using a rolling pin works wonders as well—it’s almost therapeutic! Just ensure you crush them thoroughly until they resemble sand; this texture will help bind everything nicely.
- Microwave-safe bowls – You’ll need several microwave-safe bowls: one for melting your almond bark and others for each color of candy melts. Using glass or ceramic bowls ensures even heating without hot spots—this is key when working with chocolate-like substances!
- Plastic squeeze bottles – These handy little tools allow you to drizzle melted candies elegantly over your Oreo balls without making too much mess—a true game-changer when decorating!
By gathering these essential pieces beforehand, you’re setting yourself up for success in creating these charming treats!
Preparing the Red White and Blue Oreo Balls
Step 1: Line Your Baking Sheet
Before diving into mixing ingredients together—which can get messy—let’s prepare our workspace by lining a baking sheet with parchment paper. This step might seem small but is absolutely critical because it provides a non-stick surface where our finished truffle balls will rest as they chill and set up nicely after being coated in chocolate. Remember: taking time now saves hassle later!
Step 2: Crush Those Oreos
Next up is one of my favorite steps: crushing those delightful Oreo cookies into fine crumbs! If you’re using your food processor, simply toss all 36 cookies into its bowl and pulse them until they resemble sand—no large chunks here! But if you’re opting for the good old-fashioned method with a rolling pin, place them inside your resealable bag before giving them some love through gentle rolling motions until finely crushed (don’t forget to release any frustrations along the way!). Why do we crush them? The finer texture allows better binding when combined with cream cheese later on—a step that’s crucial for achieving smooth truffle perfection.
Step 3: Mix Cookies & Cream Cheese
With our glorious cookie crumbs ready, let’s bring out that softened cream cheese! In a large mixing bowl (trust me—you want space here), combine the crushed Oreos with cream cheese until thoroughly mixed together—this mixture should come together beautifully into one cohesive dough-like consistency. Use either an electric mixer or sturdy spatula to incorporate everything well; you’ll know it’s done when no visible streaks remain! Avoid rushing this step—it’s crucial as ensuring even distribution means every bite will be luxuriously creamy.
Step 4: Form Into Balls
Now comes perhaps my favorite part—the shaping process! Take about one tablespoon’s worth of dough at a time (or use a small cookie scoop if you have one) and roll it between your palms gently until smooth before placing each ball onto that prepared baking sheet like little patriotic treasures waiting their turn in line! Don’t worry about perfection here—a little variation adds character! Trust me on this: when chilled properly afterward (at least thirty minutes), they’ll firm up nicely making handling much easier during coating later on.
Stay tuned because we’re just getting started on transforming these delightful morsels into spectacular treats suitable for any celebration!
Step 5: Chill Out for Flavor and Texture
Now that you’ve formed those delightful little Oreo balls, it’s time for them to take a chill pill—literally! Place the baking sheet filled with your perfectly shaped balls into the refrigerator for at least 30 minutes. I cannot stress enough how crucial this step is for both the texture and flavor of your treats. Chilling allows the cream cheese to firm up, which not only helps the balls hold their shape when you dip them in chocolate but also deepens the flavors as they meld together. This is one of those beautiful moments in cooking where patience pays off; by letting them rest, you’re allowing those rich, creamy notes from the cream cheese to marry beautifully with the sweet crunch of the Oreos. So, don’t rush this step; let your creations relax while you sip on a cup of tea or coffee and dream about how delicious they’ll be!
As they cool, keep an eye on the clock but also trust your instincts. If after 30 minutes they still feel a bit soft when you touch them, give them another 15 minutes. You want them cold enough to handle easily but not so hard that they become difficult to coat later. Remember, the goal here is a creamy center encased in a luscious chocolate shell—an utterly intoxicating combination that’s well worth the wait!
Step 6: Melting Chocolate Magic
While those little beauties are cooling, it’s time to prepare your almond bark for dipping! Break up 1 pound of white almond bark into small squares and place them in a microwave-safe bowl. The reason we use almond bark instead of regular chocolate is that it melts smoothly and coats beautifully without tempering—a technique that can be tricky for many home cooks but is absolutely non-negotiable when it comes to achieving that glossy finish! Microwave your almond bark for one minute initially, then give it a good stir. This part is important because even if it seems like nothing has happened, microwaving can heat unevenly, leading to hot spots that could burn.
After stirring, continue heating in 10-15 second increments, stirring thoroughly after each round until you see just a few tiny lumps remaining in the bowl. At this point, stop microwaving; residual heat will finish melting those last bits when stirred. This delicate dance between heat and stirring ensures that your melted chocolate will be silky smooth—a texture that’s essential for getting that perfect coating around each Oreo ball without clumps or unappealing drips. Trust me on this: when you dip them into this liquid gold, you’ll want every bite to be as exquisite as possible!
Step 7: The Dipping Dance
Once your Oreo balls have chilled beautifully and your almond bark is perfectly melted, it’s time for the fun part—dipping! Using a fork (or even better, a dipping tool if you have one), carefully lower one chilled ball into the melted chocolate. Allow it to get fully submerged before lifting it out again; this ensures an even coating all around. But here’s where it gets a bit tricky—give it a gentle shake while holding it over the bowl to let any excess chocolate drip off. This step is key because too much chocolate can lead to puddles forming on your baking sheet instead of those nice clean lines we’re aiming for.
Once you’ve tapped off most of the excess chocolate, place it back onto your lined baking sheet to set. Don’t worry if some chocolate slips down or creates an imperfect edge—that’s all part of their charm! You can always do a second layer once they’ve hardened up; just make sure you let each layer set completely before applying more. This process creates depth in flavor and texture—the first layer acts almost like a seal that locks in moisture while providing structure for any additional layers you wish to add later on.
Step 8: Colorful Coating with Candy Melts
Now comes another exciting phase where we introduce vibrant colors using our candy melts! In two separate microwave-safe bowls, add 6 ounces each of red and blue candy melts, respectively. Just like we did with the almond bark, start by heating these melts in the microwave for 30 seconds, then stir vigorously! The color will begin to bloom beautifully during this process; however, watch closely because candy melts can seize up quickly if overheated.
Continue heating in 10-20 second intervals, stirring after each cycle until they’re completely smooth and glossy—this is where they transform from mere bits of colored waxy goodness into something truly special! Once melted and ready to go, transfer these colorful concoctions into plastic squeeze bottles if you have them; this makes drizzling oh-so-easy but if you’re short on supplies, using spoons works just fine too.
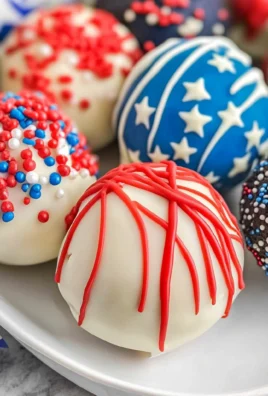
Drizzle these vibrant colors over your coated Oreo balls with wild abandon! Imagine how stunning they’ll look against the white background—a true patriotic display that’s both eye-catching and celebratory! As soon as you finish drizzling each ball, sprinkle on some festive sprinkles immediately while the chocolate is still warm; otherwise, they’ll slide right off once everything hardens up. You want that extra crunch and pop of color with every bite—trust me when I say this last step elevates these delicious treats from ordinary to extraordinary!
Conclusion:
As we wrap up this flavorful journey through crafting your very own Red White and Blue Oreo Balls, my hope is that excitement bubbles within you just as it does within me. The blending of crushed Oreos with rich cream cheese creates an extraordinary filling that practically melts in your mouth. Then comes that luscious layer of white chocolate coating, mingling perfectly with vibrant red and blue drizzles—it’s truly an edible celebration! These little spheres of joy not only taste amazing but also bring together family and friends around the table; there’s something profoundly satisfying about sharing homemade treats at gatherings.
Why should this recipe be on your must-try list? It’s not just about indulgence; it’s about joyfully participating in the creation process—each step offers opportunities for laughter and connection as you roll those balls between your hands or drizzle melted candy with giddy anticipation. Perfect for national holidays, summer barbecues, or any occasion where love is shared through food, these truffles shine brightly amidst any dessert spread. Picture yourself pulling out a colorful tray filled with these beauties—your guests’ faces lighting up will be worth all the effort!
Imagine savoring one alongside a cup of rich coffee or tea for an afternoon pick-me-up; their sweetness perfectly balances against the warmth of your drink. Or perhaps you might enjoy one during movie night with friends, where its creamy interior becomes even more enticing when paired with buttery popcorn—you’ll find yourself reaching for another before you know it! For an elevated experience, serve alongside fresh berries or even ice cream; just think of how heavenly it would feel to bite into one while indulging in creamy vanilla bean ice cream—the combination is absolutely heavenly.
Feeling adventurous? This recipe is wonderfully adaptable! Swap out classic Oreos for seasonal flavors like pumpkin spice or peppermint crunch during holiday festivities—they bring unexpected twists that elevate this already extraordinary treat. You could even play around with different colored candy melts based on upcoming holidays or themes; how fun would it be to create pastel versions for spring celebrations? I invite you to embrace creativity in your kitchen: try it out yourself and don’t forget to share your experiences! I truly believe every variation adds its unique touch—so go ahead, make these Red White and Blue Oreo Balls yours!

Red White and Blue Oreo Balls
- Total Time: 30 minutes
- Yield: Makes approximately 24 Oreo Balls 1x
Description
Celebrate with delightful Red White and Blue Oreo Balls! These no-bake treats are perfect for any occasion—try making them today!
Ingredients
- 36 Oreo cookies
- 8 ounces cream cheese (softened)
- 1 pound white almond bark
- 6 ounces red candy melts
- 6 ounces blue candy melts
- Sprinkles (optional)
Instructions
- Line a baking sheet with parchment paper.
- Crush the Oreo cookies into fine crumbs using a food processor or by placing them in a resealable bag and rolling with a pin.
- In a large mixing bowl, combine the crushed Oreos with softened cream cheese until well mixed.
- Roll the mixture into tablespoon-sized balls and place them on the prepared baking sheet.
- Chill the balls in the refrigerator for at least 30 minutes until firm.
- Melt white almond bark in a microwave-safe bowl until smooth.
- Dip each chilled Oreo ball into the melted almond bark, letting excess chocolate drip off before placing it back on the baking sheet.
- Melt red and blue candy melts separately and drizzle over the coated Oreo balls. Add sprinkles if desired.
- Allow the chocolate to set completely before serving.
- Prep Time: 20 minutes
- Cook Time: 10 minutes
- Category: Dessert
- Method: No-Bake
- Cuisine: American
Nutrition
- Serving Size: 1 ball (30g)
- Calories: 150
- Sugar: 12g
- Sodium: 65mg
- Fat: 8g
- Saturated Fat: 4g
- Unsaturated Fat: 4g
- Trans Fat: 0g
- Carbohydrates: 17g
- Fiber: <1g
- Protein: 1g
- Cholesterol: <5mg
Leave a Comment