There’s something truly magical about creating a dessert that can transport you back to childhood memories of campfires, laughter, and the sweet aroma of melting chocolate and toasted marshmallows. This Smores Cake is not just a recipe; it’s an experience that captures the essence of those cherished moments while allowing us to enjoy them in the comfort of our own kitchens. Imagine slicing into a warm, gooey cake that embodies all the flavors of a classic s’more—the crunchy graham cracker crust, the silky chocolate, and the fluffy marshmallow filling—each bite is an invitation to reminisce and revel in the joy of simple pleasures. I promise you, this cake will be a revelation for your taste buds, offering both nostalgia and newness in every slice.
What makes this Smores Cake really special is its ability to bring people together. Whether it’s a cozy family gathering or a summer soirée with friends, this dessert acts as a bridge between tradition and innovation. It’s perfect for those who want to indulge without the hassle of outdoor grilling or waiting for a campfire to get just right. Plus, being able to whip up this treat indoors means you can enjoy its delightful flavors year-round! So grab your apron, gather your ingredients, and let’s embark on this delicious journey together.
Smores Cake: A Sweet Journey into Nostalgia
Welcome to my kitchen! Today, we’re diving into one of my absolute favorite desserts—a Smores Cake that combines all the classic elements we adore about s’mores but in a beautifully baked form! This cake not only satisfies your sweet tooth but also evokes warm memories and brings smiles around the table. The combination of graham crackers, luscious chocolate, and fluffy marshmallow fluff creates an utterly intoxicating experience that’s sure to leave everyone craving more. Trust me when I say this cake will become your go-to dessert for any occasion!
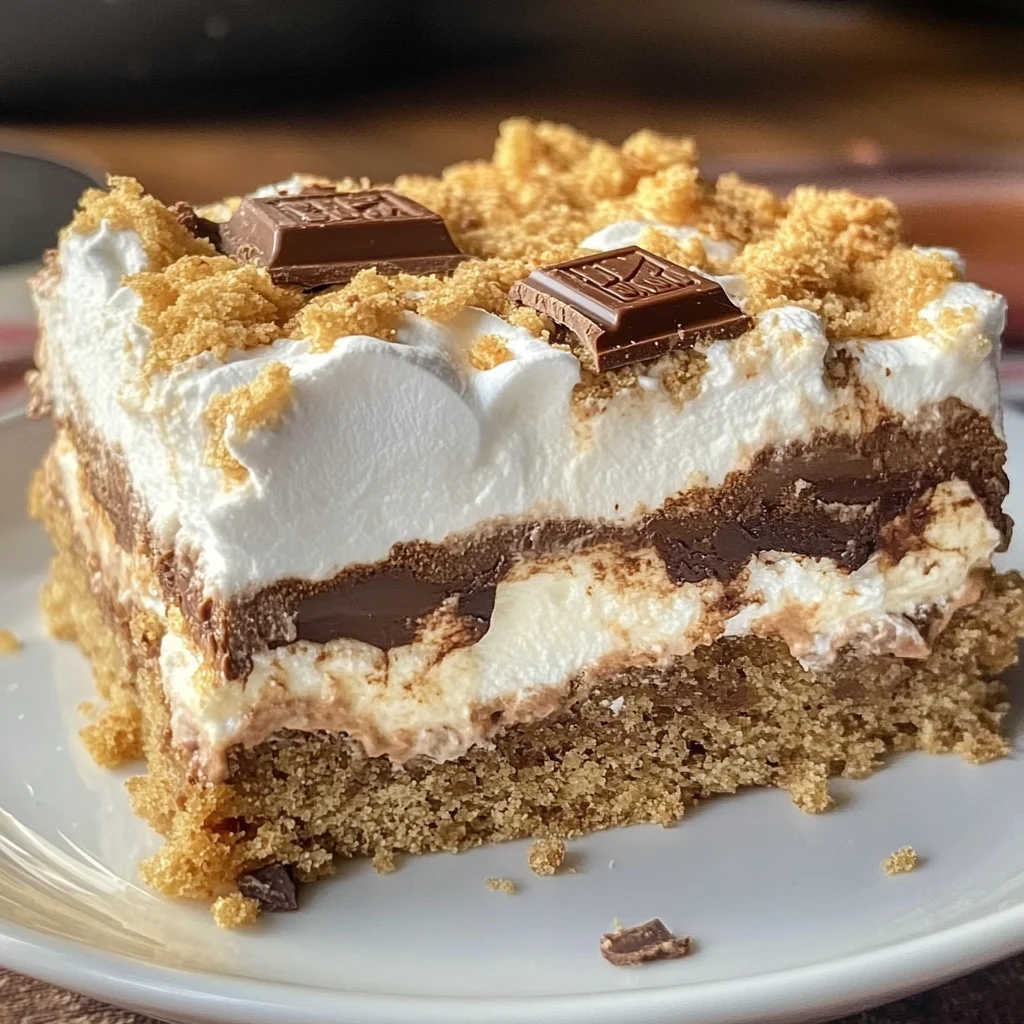
Ingredients:
As we set out on this culinary adventure together, let’s take a moment to appreciate each ingredient that contributes to our delectable Smores Cake. Each one plays a vital role in creating the perfect balance of texture and flavor.
- 1 cup (2 sticks or 226g) unsalted butter, softened to room temperature. This is crucial for creaming properly and creating that light, airy texture we’re aiming for in our Smores Cake. If your butter is too cold, it won’t cream effectively; if it’s melted, your cake may spread too much during baking. Always opt for high-quality butter—European-style varieties with higher fat content will give you even richer results that elevate your cake from good to extraordinary.
- 1/2 cup brown sugar. Brown sugar brings moisture and depth of flavor thanks to its natural molasses content. It adds a subtle caramel note that complements our chocolate beautifully while ensuring our cake remains soft and tender. Choosing fresh brown sugar that’s not hard clumping together promises smooth mixing and better incorporation into your batter.
- 1 cup granulated sugar. The granulated sugar contributes sweetness as well as structure; it helps achieve that delicate crumb we all love in cakes. When creamed with butter, it aerates the mixture—this is essential for creating lift during baking! Always measure accurately; too much sugar can lead to an overly dense cake.
- 2 large eggs. Eggs are critical here—not just for binding but also for adding richness and moisture. They help create that wonderful texture by providing stability during baking while contributing protein which supports the overall structure of our cake.
- 2 teaspoons pure vanilla extract. This liquid gold enhances every other flavor in our cake while adding warm undertones reminiscent of sweet memories shared around dessert tables. Always choose pure vanilla extract over imitation for unparalleled taste; it makes all the difference!
- 2 2/3 cups all-purpose flour. Flour is what gives our cake structure; it provides stability while allowing it to rise beautifully in the oven! Make sure you spoon it gently into your measuring cup without packing it down—too much flour can lead to a dry result instead of tender bliss.
- 3/4 teaspoon kosher salt. Salt may seem like an insignificant ingredient but trust me—it’s absolutely paramount! It enhances sweetness by balancing out flavors and highlights every component in our Smores Cake without making it “salty.” Always use kosher salt as it’s less processed than table salt.
- 1 1/2 cups graham cracker crumbs. These crumbs serve as the heart of our s’mores experience—they provide that signature crunch along with distinct flavor notes reminiscent of bonfire nights under starlit skies! You can crush store-bought graham crackers or buy pre-ground crumbs; just ensure they’re fresh for optimal taste.
- 4 XL Hershey bars (4.4 ounce size). Chocolate lovers rejoice! These bars melt perfectly into gooey pockets throughout the cake while adding rich decadence that’s simply irresistible—truly defining what makes s’mores so special! For vegan options, choose dark chocolate bars that suit your preferences.
- 16 ounces vegan marshmallow fluff. This fluffy goodness creates layers of sweetness reminiscent of roasted marshmallows yet avoids traditional gelatin-based products! Its airy texture allows for easy spreading over warm layers while contributing delightful richness without compromising dietary choices.
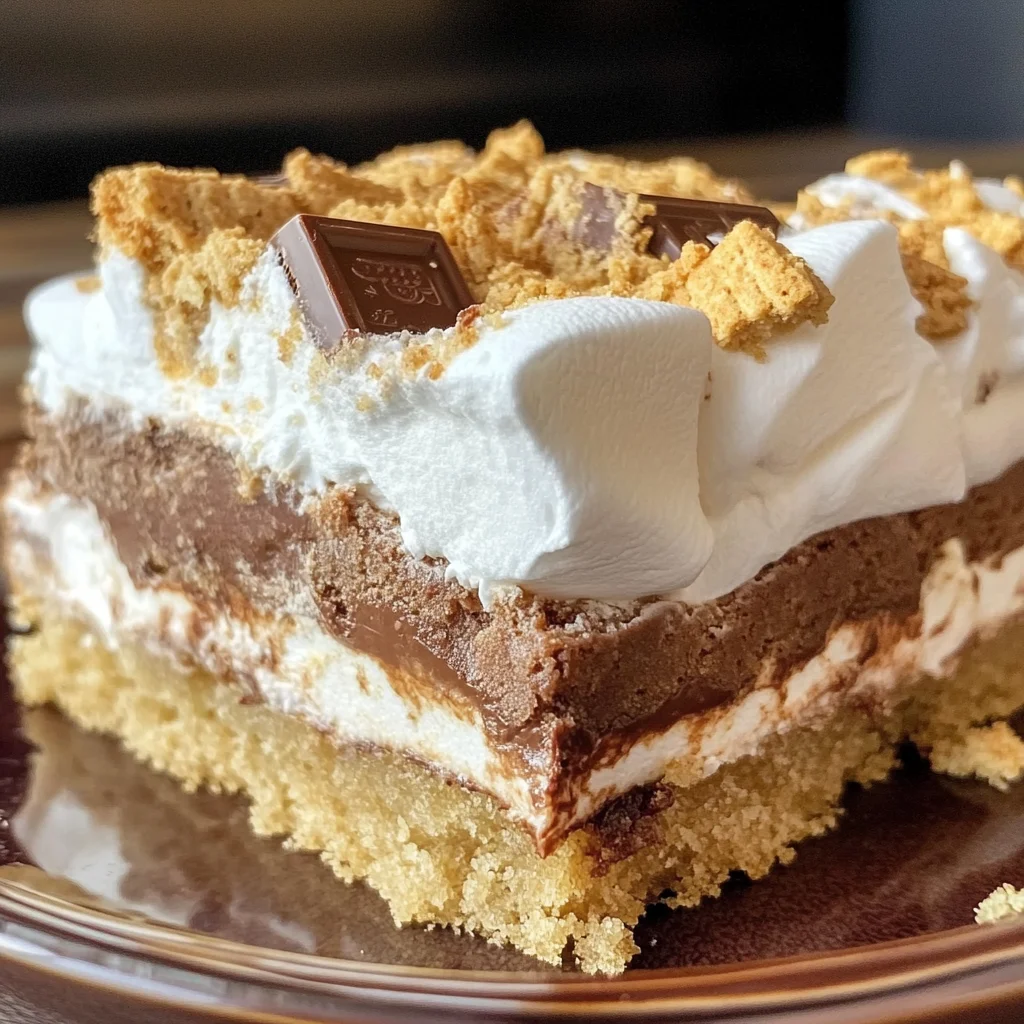
Equipment You’ll Need:
Before we dive into making this decadent treat, let’s ensure you have all the necessary tools at hand! Having the right equipment not only makes baking smoother but also enhances your enjoyment throughout the process.
- Large mixing bowl – essential for combining ingredients thoroughly without splashing or spilling! Opting for glass or stainless steel allows you better visibility into how well things are incorporated as you mix away!
- Electric mixer – whether handheld or stand-alone models work wonders here by saving time & effort when creaming butter & sugars together until light & fluffy—a truly satisfying sight!
- 9×13 baking dish – this vessel will house our lovely creation perfectly during baking & provide ample surface area once cooled down so everyone can indulge generously without hesitation! Make sure it’s greased before pressing down dough!
- Measuring cups & spoons – accurate measurements are non-negotiable when following recipes & achieving consistent results each time—you’ll thank yourself later when everything turns out just right!
Preparing the Smores Cake
Step 1: Preheat & Cream Your Ingredients
First things first: preheat your oven to 350°F (175°C). This step ensures an even bake as soon as you place your cake inside—don’t rush this part because starting off at the right temperature is essential for achieving that perfect rise and golden-brown crust we’re after with our Smores Cake! While that’s happening, grab a large mixing bowl and add your softened unsalted butter alongside both sugars—brown and granulated—and start beating them together using an electric mixer until they transform into a light-colored creamy mixture that’s fluffy and inviting (about 3–5 minutes). The process known as creaming allows air to incorporate into fat molecules which results in leavening once baked—this is what gives us such delightfully soft cakes!
Step 2: Add Eggs & Vanilla
Once you’ve achieved that lovely creamy texture from step one (seriously—it should look fluffy!), it’s time to mix in those two large eggs one at a time along with two teaspoons of pure vanilla extract (oh my goodness—the aroma!). Beat until fully combined—that’s where magic happens because eggs bind everything together while enriching flavors further with their natural richness; trust me on this step—it’s crucial!
Step 3: Combine Dry Ingredients
In another bowl (yes—I know more dishes!), combine your dry ingredients: flour, kosher salt, and graham cracker crumbs. Mixing these separately first ensures there’s no clumping later on when added directly into wet mixes—it helps create uniformity throughout batter resulting ultimately in better textures within slices once baked! Gradually fold dry ingredients into wet using spatula until everything comes together smoothly—don’t overmix though; we want tenderness here rather than toughness!
Step 4: Press Dough Into Baking Dish
Now comes one of my favorite parts—dividing half of this glorious dough carefully pressed evenly across greased 9×13 baking dish base like creating foundations before constructing something magnificent above it (don’t worry if it seems sticky!). We want an even base layer since it’ll hold delicious additions we’ll be adding shortly thereafter; think about keeping thickness consistent so each piece bakes evenly later on too!
Stay tuned as we move forward with layering chocolate bars next—I promise you won’t want to miss seeing how it transforms everything beautifully ahead!
Crafting Your Irresistible S’mores Cake: A Sweet Journey
Oh, my dear friends, as we embark on the delightful journey of creating this S’mores Cake, I can hardly contain my excitement! This cake is not just a dessert; it’s a nostalgic embrace that takes you back to summer nights spent around a crackling fire with gooey marshmallows and rich chocolate. With every layer, we’re capturing those flavors in a way that is both utterly intoxicating and profoundly satisfying. So, let’s dive deeper into the remaining steps of this scrumptious recipe!
Step 5: Spreading the Fluff of Joy
Now comes one of the most fun parts—spreading that luscious vegan marshmallow fluff over our graham cracker crust. This step is crucial because it creates that iconic s’mores flavor profile we all adore. Grab a spatula or even the back of a spoon (whatever feels right in your hands) and gently dollop the fluff across the entire surface of the cake base, allowing it to cascade like soft clouds over the chocolate bars nestled below. Trust me on this: don’t skimp on the fluff! The marshmallow acts as a binding agent and brings that sweet, gooey texture that will meld beautifully with the rest of our cake.
As you’re spreading, take care to cover every nook and cranny. If you miss even a small section, it could lead to dry spots in your finished cake—something we absolutely want to avoid! Think about how wonderful it’ll be when you cut into the cake later and see that perfect layer of marshmallow fluff peeking out from between layers—the anticipation alone is enough to make your mouth water! Once you’ve got it all evenly spread, step back for just a moment and admire your work. You’re already halfway to dessert bliss!
Step 6: Crumbling for Texture
Next up, let’s talk about crumbling that remaining dough over our beautiful marshmallow blanket. This step serves two important purposes: first, it adds texture to our S’mores Cake, providing that lovely contrast between creamy fluff and crumbly crust; second, it helps create a barrier that traps moisture within the cake while baking. As you crumble the dough into small pieces using your fingers (think about breaking apart cookie dough), aim for various sizes—some larger chunks and some smaller bits will create an inviting visual appeal.
Once you have your dough crumbled generously over the marshmallow fluff, take a moment to pat down gently. This isn’t just for looks; pressing down slightly helps meld the layers together while baking, ensuring every bite is cohesive yet still offers delightful bursts of flavor and texture. Don’t rush this step; give it all some love! As you do this, keep an eye out for any areas where the marshmallow might peek through too much—if you notice any gaps, simply sprinkle more crumbles over those spots until everything looks cozy and covered.
Step 7: Baking to Perfection
Now we arrive at perhaps one of the most anticipated moments: baking our S’mores Cake! Preheat your oven to 350°F if you haven’t done so already; consistent temperature is absolutely paramount here as it ensures even cooking throughout. Carefully place your pan on the center rack of your preheated oven—a position that allows heat to circulate evenly around the cake. Bake for 30-35 minutes while keeping an eye on its transformation.
What should you look for? You want to see your cake puffing up slightly with a golden brown top—the kind of color that makes you say “I can’t wait!” But remember not to open the oven door prematurely; doing so can let out precious heat and disrupt this delicate process. Instead, try peering through the window every now and then without interrupting its warmth. When you finally pull it out of the oven, let your senses guide you—the aroma wafting through your kitchen will be nothing short of divine! It should feel firm but springy when lightly touched on top—a sign that it’s perfectly baked.
Step 8: Cooling Down Before Indulgence
Patience is key when it comes to enjoying our masterpiece! Once you’ve removed your S’mores Cake from the oven, allow it to cool in its pan on a wire rack for about 15-20 minutes before slicing into it. This resting period is absolutely non-negotiable because it lets all those incredible flavors mingle together harmoniously while preventing any sogginess from rushing in too soon—it’s like letting a fine wine breathe before savoring!
While it’s tempting to dig right in (and believe me, I totally understand that urge!), giving it time will transform each bite into something truly extraordinary. You’ll notice how cutting into it becomes easier as everything settles into place; plus, allowing some cooling time enhances those decadent layers of chocolate and marshmallow fluff so they meld together beautifully when served warm but not scalding hot.
Conclusion:
As we wrap up this delightful journey through the world of Smores Cake, I can’t help but reflect on just how special this recipe truly is. From the first creaming of butter and sugars to the final golden-brown bake that fills your kitchen with an utterly intoxicating aroma, every step of this process brings joy and anticipation. The combination of graham cracker crust paired with rich chocolate and fluffy marshmallow creates a symphony of flavors that dances on your palate—a truly extraordinary experience! Each bite offers not only sweetness but also nostalgia, reminiscent of campfire nights spent under starlit skies.
This recipe isn’t just about taste; it’s also about the joy of creating something wonderful with your own two hands. Whether you’re baking for friends at a potluck or treating yourself after a long week, Smores Cake shines bright in any setting. Picture pulling this beauty from the oven: its golden edges glistening against soft marshmallow peaks—it’s like a warm invitation beckoning everyone around you to gather and share in something sweetly special. It’s perfect for birthdays, casual get-togethers, or simply as an indulgent dessert after dinner when you want something that feels both nostalgic and new.
Now let’s talk pairings! Imagine savoring one piece alongside a steaming cup of coffee or tea; the warmth of your beverage perfectly complements the cake’s gooey richness. For an afternoon pick-me-up after lunch, serve it with fresh berries—the tartness contrasts beautifully with all that sweetness! And if you’re feeling extra indulgent? Drizzle some melted dark chocolate over each slice for an added layer of luxury that takes everything up another notch.
Feeling adventurous? This recipe is wonderfully adaptable! You could swap out traditional chocolate bars for peanut butter cups or even add crushed nuts for an extra crunch factor—how fun would that be? Or perhaps try incorporating different flavored extracts into the batter—almond or coconut could elevate our beloved Smores Cake into uncharted territories! I invite you wholeheartedly to experiment and make this recipe uniquely yours; after all, cooking should be as personal as sharing stories around a cozy fire. So go forth with confidence—bake this cake, relish every bite yourself or share it with loved ones—and don’t forget to come back and share your creations with me! Happy baking!
Smores Cake
- Total Time: 55 minutes
- Yield: Serves approximately 12 slices 1x
Description
Indulge in the delightful experience of our S’mores Cake, a nostalgic dessert that encapsulates the essence of summer campfires and sweet memories. This cake features a crunchy graham cracker crust, luscious chocolate layers, and fluffy vegan marshmallows, offering a gooey, decadent treat perfect for any occasion. Whether it’s a family gathering or a cozy evening at home, this cake invites you to relive cherished moments while enjoying its delightful flavors year-round. With easy preparation and simple ingredients, you can create a slice of bliss that will have everyone coming back for more!
Ingredients
- 1 cup unsalted butter, softened
- 1/2 cup brown sugar
- 1 cup granulated sugar
- 2 large eggs
- 2 teaspoons pure vanilla extract
- 2 2/3 cups all-purpose flour
- 3/4 teaspoon kosher salt
- 1 1/2 cups graham cracker crumbs
- 4 XL dark chocolate bars (or vegan chocolate)
- 16 ounces vegan marshmallow fluff
Instructions
- Preheat oven to 350°F (175°C). Grease a 9×13 baking dish.
- In a large bowl, cream together softened butter, brown sugar, and granulated sugar until light and fluffy.
- Add eggs one at a time along with vanilla extract; mix until combined.
- In another bowl, whisk together flour, kosher salt, and graham cracker crumbs. Gradually fold dry ingredients into wet mixture until combined.
- Press half of the dough evenly across the bottom of the prepared baking dish.
- Layer dark chocolate bars over the dough followed by spreading vegan marshmallow fluff on top.
- Crumble remaining dough over the marshmallow layer and gently press down.
- Bake for 30-35 minutes until golden brown on top. Allow cooling before slicing.
- Prep Time: 20 minutes
- Cook Time: 35 minutes
- Category: Dessert
- Method: Baking
- Cuisine: American
Nutrition
- Serving Size: 1 serving
- Calories: 330
- Sugar: 30g
- Sodium: 150mg
- Fat: 15g
- Saturated Fat: 8g
- Unsaturated Fat: 6g
- Trans Fat: 0g
- Carbohydrates: 47g
- Fiber: 1g
- Protein: 3g
- Cholesterol: 30mg

Leave a Comment