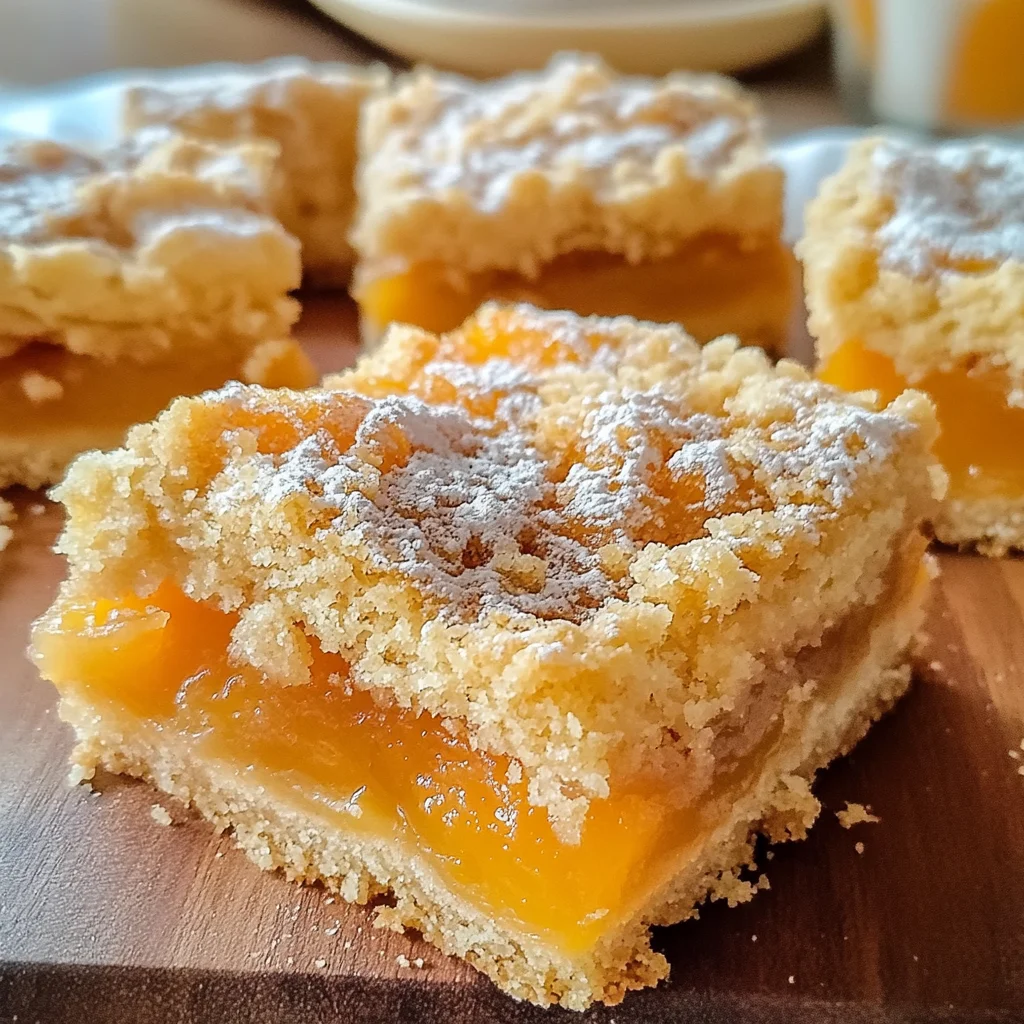
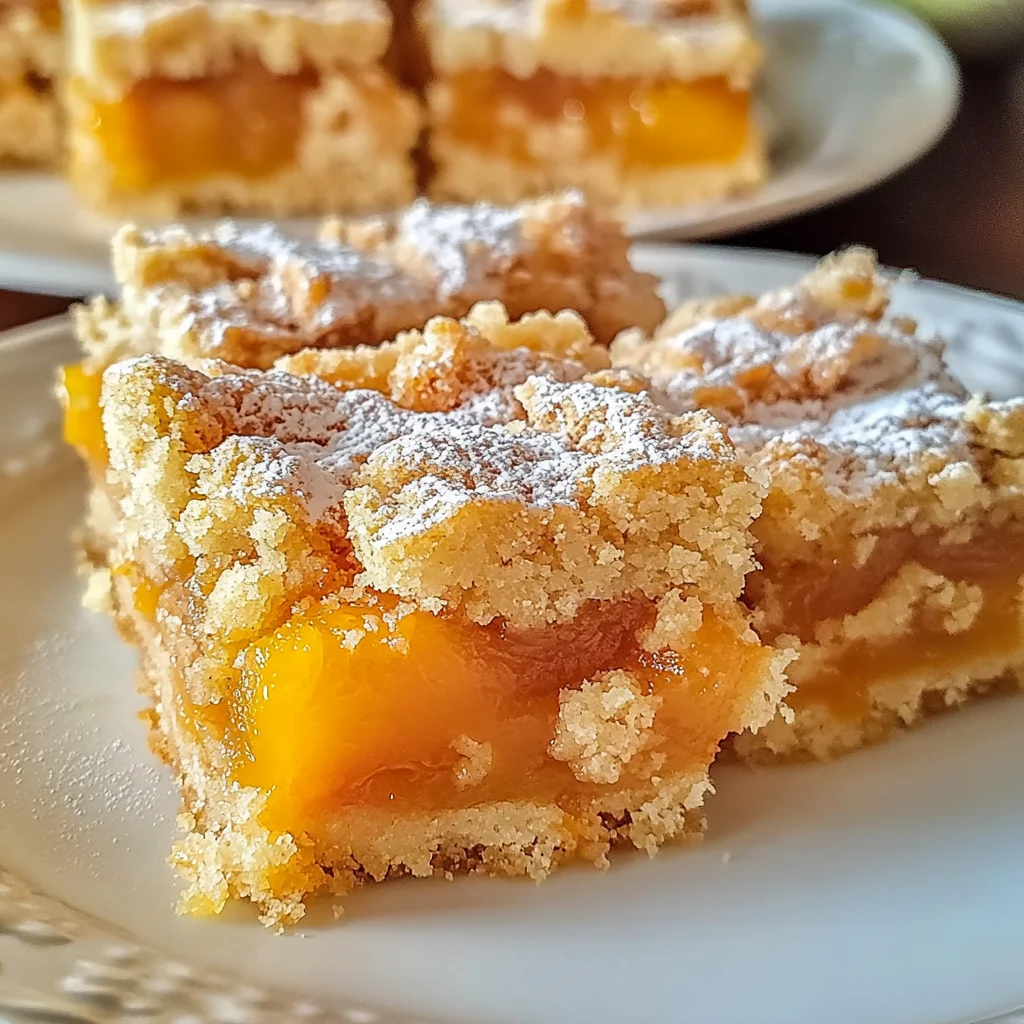
There’s something almost magical about the moment you step into your kitchen, the air thick with anticipation and the aroma of what’s to come. As I stand here, ready to share my beloved Apricot Shortbread Bars Recipe, I’m reminded that cooking is more than just combining ingredients; it’s an experience that wraps you in warmth and nostalgia. These bars are a delightful union of buttery shortbread and luscious apricot filling, creating a symphony of flavors that will dance on your palate. Imagine sinking your teeth into these golden squares—crisp on the edges, tender in the center, and filled with a sweet-tart apricot treasure that takes you straight to sunny afternoons basking in the glow of good company. I promise you, every bite is profoundly satisfying, a little slice of happiness that beckons you back for more.
What makes this recipe truly special lies not only in its taste but also in its simplicity. It’s a cherished family recipe that has been passed down through generations, each adding their unique touch while maintaining the essence of what makes it extraordinary. The beauty of these Apricot Shortbread Bars is how they straddle the line between tradition and innovation. The dried apricots lend sweetness and a deep fruitiness, balanced perfectly by a hint of lemon juice that brightens every mouthful. Whether you’re preparing them for a holiday gathering or simply indulging yourself on a quiet afternoon, these bars serve as a reminder that food has an incredible power to connect us—to our memories, our loved ones, and even ourselves.
Apricot Shortbread Bars Recipe: A Slice of Sunshine
In this recipe for Apricot Shortbread Bars, we embark on a journey filled with vibrant flavors and comforting textures. The buttery shortbread crust serves as the perfect foundation for our sweet apricot filling—a combination that feels like a warm hug from the inside out. As we dive into this culinary adventure together, let’s celebrate the joy of creating something wonderful from scratch!
Ingredients:
As we gather our ingredients for this delightful treat, remember that each component plays an essential role in achieving that perfect balance of flavor and texture. Let’s take a closer look at what we’ll need:
- 3 cups (360g) all-purpose flour. This ingredient is foundational to our shortbread crust—it provides structure while allowing for a crumbly yet tender texture. When selecting your flour, look for high-quality all-purpose varieties; they should be finely milled without any lumps or moisture. Remember that measuring flour can be tricky—scooping directly from the bag can compact it too much; instead, spoon it into your measuring cup and level it off with a knife for accuracy.
- 1 cup (200g) granulated sugar. Sugar not only sweetens our Apricot Shortbread Bars but also contributes to their delicate crumb structure through its ability to aerate during mixing. Using fine granulated sugar will help ensure even distribution throughout the dough—this is crucial because uneven sugar can lead to inconsistent sweetness across the bars. If your apricots are particularly sweet, feel free to adjust this amount to suit your taste.
- 1 teaspoon baking powder. This leavening agent is key in giving our buttery crust just enough lift while keeping it light and tender. It works by releasing carbon dioxide when mixed with moisture and heat, creating tiny bubbles within the dough that expand during baking. Without it, we risk ending up with dense bars—definitely not what we’re aiming for!
- 1/2 teaspoon salt. Salt enhances flavors beautifully—it acts as a flavor amplifier! In baked goods like these bars, it helps balance out sweetness and brings depth to every bite. A pinch might seem minor, but trust me—it’s absolutely paramount! Just ensure it’s evenly distributed throughout your mixture so every piece gets its fair share.
- 1 1/2 cups (340g or 3 sticks) unsalted butter, cold and cut into small cubes. Butter is where the magic begins! Its richness adds an incredible depth of flavor while contributing to that melt-in-your-mouth texture we crave in shortbread desserts—every bite should feel like pure indulgence! Using unsalted butter allows us greater control over seasoning; this way, we can adjust salt levels according to personal preference without any surprises.
- 1 large egg, lightly beaten. This ingredient binds everything together while also adding moisture and richness to our dough—a critical factor in achieving those perfectly chewy edges against soft centers! When incorporating eggs into your recipes, always remember they should be at room temperature unless specified otherwise; this helps with emulsifying fat smoothly so there are no visible chunks when mixing.
- 1 teaspoon vanilla extract. Ahh! The fragrant essence of vanilla brings warmth and comfort—it’s like a cozy blanket wrapped around each bar! Always choose pure vanilla extract over artificial options; its depth of flavor enhances both sweetness and complexity within baked goods beautifully.
- 2 cups (about 350-400g) dried apricots, roughly chopped. Dried apricots bring sweetness alongside chewiness—both qualities complementing our buttery crust wonderfully! When shopping for dried fruit products such as these beauties (or any), look for ones free from added sugars or preservatives; organic options are often best since they retain their natural flavors without interference from chemicals.
- 1 1/2 cups water. Water serves as an essential component when cooking down our delicious filling—the liquid helps soften those dried apricots until they become wonderfully tender! It also aids in forming the syrupy consistency of our filling once reduced properly after simmering—it creates gooey goodness everyone craves!
- 1/2 cup (100g) granulated sugar (adjust to taste depending on apricot sweetness). Like before mentioned earlier regarding granulated sugar—it supports balancing out tartness from fruits beautifully! Depending on how sweet your chosen variety may be dictates how much extra sweetness may need adjusting during preparation stages ahead!
- 2 tablespoons fresh lemon juice. Brightening up flavors significantly while cutting through rich elements makes citrus indispensable here! It’s crucial not just because it adds zingy freshness but also contributes acidity necessary alongside natural sugars present within fruits themselves—this harmony creates something utterly intoxicating!
- 1/4 teaspoon almond extract (optional but highly recommended). Almond extract lends another dimension altogether—it offers nutty warmth amidst fruity notes making everything come alive even more brilliantly than imagined! While optional if desired—you won’t regret adding just remember little goes long way!
- Pinch of salt rounds everything off nicely ensuring nothing overwhelms other flavors present bringing forth harmonious completeness!
Now let’s move on from gathering these gorgeous ingredients into action mode because good things take time—but trust me every step leads towards something truly extraordinary awaiting us soon enough!
Equipment You’ll Need:
Before diving into creating our Apricot Shortbread Bars Recipe masterpiece together—a few essential tools will make this culinary journey smoother than ever before! Each piece serves as either an assistant helping achieve specific tasks or enhancing overall experience tremendously so don’t overlook their importance:
- Measuring cups & spoons: Precision matters hugely in baking; using proper measurements ensures consistent results across batches whether scaling up/down amounts needed based upon servings desired later down line too!
- Mixing bowls: A sturdy set allows ample space when whisking dry ingredients together while also providing room when folding wet mixtures without fear spilling everywhere—that would be counterproductive wouldn’t it?
- Pastry blender or food processor: Both tools come handy enabling easier incorporation between butter/flour mixture ensuring correct texture achieved without overworking dough which could compromise final product quality leading undesired outcomes.
- 9×13 inch baking pan: This size allows ample surface area needed where crust fits neatly within yielding perfect thickness once baked properly ensuring no soggy bottoms occur either—a non-stick option makes life simpler too!
- Parchment paper: Lining pans beforehand prevents sticking issues allowing easy removal post-baking—a crucial step saving frustration later down road!
Now armed with these ingredients & tools let’s dive deep into preparing those heavenly treats awaiting us warmly nestled inside oven breathing life back into kitchen atmosphere filled wonderment excitement anticipation…
Step 1: Creating the Apricot Filling
The first step involves crafting our delicious apricot filling—a vital part that elevates these bars beyond ordinary desserts! In a medium saucepan over medium heat combine chopped dried apricots along with water & sugar—this initial mixture sets forth magical transformation process turning simple fruits into luscious jam-like concoction packed full flavor potential waiting blossom fully later baking stage ahead! Bring everything together gently stirring occasionally watching closely until simmering occurs—that bubbling bliss shows signs things progressing nicely now time adjust flame lower keeping covered tight lid allowing steam work wonders softening fruit transforming them beautifully tender after roughly fifteen minutes pass by patiently letting simmer away those aromas fill room enticing everyone nearby reminding them about dessert coming soon too…
Once all becomes pleasantly softened remove from heat stirring freshly squeezed lemon juice along almond extract if using then sprinkle pinch salt here too which balances out flavors beautifully heightening overall experience later enjoyed bites taken straight plate mouthwatering goodness lying beneath surface awaiting discovery! For those preferring smoother consistency you could utilize immersion blender pulsing several times or transfer mixture food processor blending until desired texture reached—some enjoy chunkier style others prefer silky spreadable option either way doesn’t change fact end result remains absolutely magnificent regardless choice made… Set aside allowing cool slightly before moving onto next stage crust preparation now happily unfolding ahead awaiting us patiently…
Step 2: Preparing Your Oven & Crust
Next up let’s preheat oven setting temperature at three hundred seventy-five degrees Fahrenheit or one hundred ninety degrees Celsius before diving right into preparing crust itself—this crucial step ensures proper browning occurs across entire batch evenly thus avoiding undercooked sections later potentially ruining entire effort put forth initially spent earlier assembling whole process together expertly thus far already underway now continues smoothly onward… In addition grease/flour nine-by-thirteen inch baking pan generously applying non-stick spray lining parchment paper inside leaving overhang edges providing convenient handles later when lifting finished product out seamlessly without fuss required whatsoever—trust me having this method prepped saves hassle enormously once cooled completely needing slicing afterward…
In large mixing bowl whisk together all-purpose flour along granulated sugar followed closely thereafter by sprinkling baking powder & salt onto top layer gently combining well integrating evenly distributing throughout dry components preventing clumps forming anywhere which could interfere smoothness resulting final outcome achieved successfully overall too… Now here comes fun part adding cold cubed butter right atop flour mixture effectively breaking down employing pastry blender fingertips alternatively if preferred using food processor pulsing method briefly until resembles coarse crumbs resembling sandy texture whilst still retaining pea-sized bits intact remaining visible throughout blend—don’t worry if looks somewhat messy trust me once combined correctly magic happens during subsequent stages further along way…
Step 3: Bringing Dough Together
Once crumbly mixture formed add lightly beaten egg alongside vanilla extract pouring gently over surface then mix everything thoroughly using fork hands cautiously working dough until begins come together cohesively forming cohesive ball-like shape developing gradually whilst remaining slightly crumbly—not overly smooth though since desire maintain rustic charm authentic shortbreads typically exhibit naturally bringing character depth richer flavor profiles shining brightest moments enjoyed finally devouring them blissfully later after ample patience shown waiting endlessly throughout creation journey experienced firsthand already thus far leading towards ultimate reward soon approaching ever closer now…
Step 4: Layering Your Creation
Here comes exciting part where we build layers showcasing beautiful textures colors throughout final presentation visual feast pleasing eye appetizing soul equally alike presenting lovingly crafted work expertly executed finesse displayed proudly atop plates served friends family gatherings alike storytelling unfolds magically around table moments shared cherished forever remembered fondly hearts warmed smiles exchanged seeing joy brought forth each slice savored thoughtfully consumed immensely satisfaction derived relishing delightful concoction prepared lovingly earlier spending time caring passion infused deeply felt spirit embraced whole-heartedly celebrating life love laughter shared experiences enjoyed around joyous occasions enveloped midst delightful ambiance created rich tapestry woven tightly bonds forged stronger lasting forever treasured memories etched timelessly hearts souls alike connected intimately nourished fed spiritually emotionally through simple acts kindness generosity fulfilled simply through sharing delectable creations baked lovingly home kitchens nurtured whole-heartedly families cherished dearly…
I can’t wait for you all to try making these delightful little squares at home—they’re sure to become favorites just as they have been in my family for years! Happy baking!
Step 5: Cooling the Bars to Perfection
Once your Apricot Shortbread Bars emerge from the oven, you might feel an irresistible urge to dive right in, but trust me when I say that patience here is not just a virtue; it’s a necessity. Placing the pan on a wire rack to cool completely is crucial. This cooling phase allows the filling to set beautifully and the shortbread base to firm up, creating that delightful contrast between creamy and crumbly textures that we all adore. The filling, while warm, is still quite soft and vulnerable—if you were to cut into it now, you’d likely end up with a beautiful but chaotic mess of apricot goo and crumbled dough.
So, allow these beauties to cool at room temperature for at least 2-3 hours—or, if you’re feeling particularly impatient (I get it!), you can pop them into the fridge after about an hour on the counter. Just think about how luscious each bite will be when you finally sink your teeth in: the buttery shortbread perfectly complementing the sweet-tart apricot filling. During this time, the flavors meld together in an extraordinary way—a mini miracle of culinary chemistry! The cooling process is vital not only for structural integrity but also for flavor development; it gives everything time to harmonize into a symphony of deliciousness that will have your friends and family raving.
Step 6: Cutting with Care
After those torturous hours of waiting (I promise it’s worth it!), it’s finally time to slice into your masterpiece! If you used parchment paper as a liner, gently lift the entire slab out of the pan using those overhangs—this little trick makes life so much easier. Now, grab a sharp knife; this part is essential because a dull knife will squish your bars instead of cutting them cleanly. For cleaner cuts—and let’s be honest, prettier presentations—consider giving your knife a quick chill in the fridge before you start slicing. Wiping the blade clean between cuts ensures that each piece maintains its gorgeous layers without becoming messy.
When cutting, aim for square or rectangular shapes that are roughly 2×2 inches; this size is perfect for enjoying alongside a cup of tea or coffee. As you slice through that golden crust and into the tender filling, take a moment to appreciate the aroma wafting through your kitchen—it’s utterly intoxicating! And don’t rush this step; allowing yourself these few precious moments will make all those hours spent preparing feel deeply rewarding. Each cut reveals layers of buttery goodness topped with bright apricot filling—they truly are little slices of heaven!
Step 7: The Finishing Touch
Now that you’ve cut your bars into beautiful squares, consider adding a sprinkle of powdered sugar on top for an elegant finish. Not only does this add a touch of sweetness, but it also provides an alluring contrast against the golden hue of your shortbread base. Simply sift some powdered sugar over each bar or across the entire batch laid out on a serving platter; this simple act transforms them from delightful homemade treats into show-stoppers worthy of any gathering.
But remember, presentation matters! The way you serve these bars can elevate their appeal exponentially—consider placing them on an ornate platter or even wrapping individual pieces in parchment tied with twine for an adorable gift idea! Your friends will be so impressed they might just think you’ve taken up professional baking! This final step isn’t just about aesthetics; it’s about showing love and care in every detail because cooking is just as much about sharing joy as it is about flavor.
Step 8: Enjoying Your Apricot Shortbread Bars
Finally, it’s time for what we’ve all been waiting for: tasting your creation! When you take that first bite, notice how the flavors dance together on your palate. The buttery richness of the shortbread pairs perfectly with the sweet-tart notes of apricot; it’s like they were destined to join forces! I recommend serving these bars slightly chilled or at room temperature—the texture holds beautifully at either stage and allows those vibrant flavors to shine through.
As you savor each bite, think back on all those steps that brought you here—from simmering apricots until they burst with flavor to crafting that crumbly shortbread crust—all culminating in this profoundly satisfying treat. Whether enjoyed at home with loved ones or shared at gatherings where laughter fills the air, I promise you these Apricot Shortbread Bars will leave everyone asking for seconds—and maybe even thirds! So go ahead and relish in your hard work—you’ve created something truly extraordinary!
Final Thoughts
As we close out this delightful journey through my beloved Apricot Shortbread Bars Recipe, I want to remind you how special cooking can be—not just because of what we create but because of who we share it with. Food has this magical ability to bring people together and create lasting memories around our tables. So whenever you make these bars (and trust me, you’ll want to again!), remember that every slice carries love poured into each step along the way. Happy baking, my friends!
Storage and Enjoyment Tips for Your Apricot Shortbread Bars Recipe
Now that your Apricot Shortbread Bars are beautifully baked, cooled, and ready to be enjoyed, let’s talk about how to keep that deliciousness alive for as long as possible. Trust me, you’ll want to savor these bars beyond just the first day. There’s something truly magical about having a sweet treat waiting for you in the kitchen, each bite a reminder of the joy that comes from baking and sharing. So, let’s dive into the best ways to store these delightful bars so they stay fresh and scrumptious!
Storing Leftover Apricot Shortbread Bars Recipe
To ensure your leftover Apricot Shortbread Bars remain heavenly, I recommend storing them in an airtight container at room temperature. This simple step is crucial because it prevents them from drying out while still allowing their delightful flavors to shine through. When properly stored, these bars can last up to a week, although I suspect they might disappear much sooner than that! For optimal quality, consider placing a slice of bread in the container with your bars; this little trick helps maintain moisture levels while also imparting a soft texture to the shortbread. Even after a few days, you’ll find that the flavors meld together beautifully—the apricots become even more pronounced and luscious with time. If you’re serving them later on or simply want to enjoy them warm again, pop them in the oven at 350°F (175°C) for about 5-10 minutes until they’re warmed through—this will revive that melt-in-your-mouth experience!
Freezing Apricot Shortbread Bars Recipe for Later
If you’re anything like me, sometimes life calls for a little foresight—especially when it comes to delicious treats! Freezing your Apricot Shortbread Bars is an excellent way to have a sweet indulgence on hand whenever you need it. To freeze them properly, first make sure they are completely cool and then cut them into squares or bars as per your preference. Individually wrap each piece in plastic wrap or aluminum foil before placing them in a freezer-safe bag or container; this keeps them nice and protected from freezer burn while capturing all those beautiful flavors. You can expect these tasty gems to stay fresh for up to three months in the freezer—perfect for those moments when you crave something sweet but don’t have the time (or energy) to bake! When you’re ready to enjoy one of these frozen delights, simply let it thaw at room temperature for about 30 minutes or warm it gently in the oven. The convenience factor here is absolutely paramount—imagine pulling out a bar on a busy day and feeling instantly comforted by its familiar taste!
Apricot Shortbread Bars
- Total Time: 50 minutes
- Yield: Approximately 16 servings 1x
Description
Indulge in the delightful harmony of flavors with our Apricot Shortbread Bars Recipe. These bars combine a buttery shortbread crust with a luscious apricot filling, making them the perfect treat for any occasion. Each square is crisp on the edges and tender in the center, offering a sweet-tart experience that transports you to sun-soaked afternoons. Whether you’re hosting a gathering or seeking a comforting dessert at home, these bars are sure to impress family and friends alike. Plus, they’re simple to make, allowing you to enjoy the joy of baking while creating something truly special.
Ingredients
- 3 cups all-purpose flour
- 1 cup granulated sugar
- 1 teaspoon baking powder
- 1/2 teaspoon salt
- 1 1/2 cups unsalted butter, cold and cubed
- 1 large egg, lightly beaten
- 1 teaspoon vanilla extract
- 2 cups dried apricots, chopped
- 1 1/2 cups water
- 1/2 cup granulated sugar (for filling)
- 2 tablespoons fresh lemon juice
- Pinch of salt
Instructions
- Preheat the oven to 375°F (190°C) and grease a 9×13-inch baking pan.
- In a mixing bowl, whisk together flour, sugar, baking powder, and salt. Cut in butter until crumbly.
- Add the egg and vanilla; mix until combined.
- Press two-thirds of the dough into the prepared pan.
- In a saucepan over medium heat, combine dried apricots, water, and sugar; simmer until tender. Stir in lemon juice and salt.
- Spread apricot mixture over crust; crumble remaining dough on top.
- Bake for about 30 minutes or until golden brown.
- Cool completely before slicing into squares.
- Prep Time: 20 minutes
- Cook Time: 30 minutes
- Category: Dessert
- Method: Baking
- Cuisine: American
Nutrition
- Serving Size: 1 bar (60g)
- Calories: 255
- Sugar: 18g
- Sodium: 85mg
- Fat: 14g
- Saturated Fat: 9g
- Unsaturated Fat: 4g
- Trans Fat: 0g
- Carbohydrates: 29g
- Fiber: 1g
- Protein: 3g
- Cholesterol: 32mg

Leave a Comment