As the scent of freshly baked pie wafts through the air, it brings with it a wave of nostalgia that wraps around me like a warm hug. There’s something truly magical about pie, especially when it’s filled with the vibrant flavors of summer fruits like cherries and blueberries. This Cherry and Blueberry Pie isn’t just a dessert; it’s a celebration of life’s sweetest moments, an invitation to gather around the table, and a reminder of cherished memories made with family and friends. Each bite reveals a symphony of flavors that dance upon your palate—the tartness of the cherries mingling with the sweet juiciness of blueberries all nestled in a buttery crust that crumbles just right. I promise you, this recipe will fill your heart with joy and your home with delightful aromas.
I’ve always been captivated by the way a simple pie can stir emotions, invoke laughter, and bring people together. It’s not just about satisfying a sweet tooth; it’s about creating an experience—a bridge between tradition and innovation that resonates across generations. The beauty of this Cherry and Blueberry Pie lies in its perfect balance of sweet and tart, allowing each fruit to shine through while complementing one another perfectly. Whether you’re celebrating a special occasion or simply indulging in a quiet evening at home, this pie is sure to create lasting memories. So, let’s roll up our sleeves and embark on this culinary adventure together!
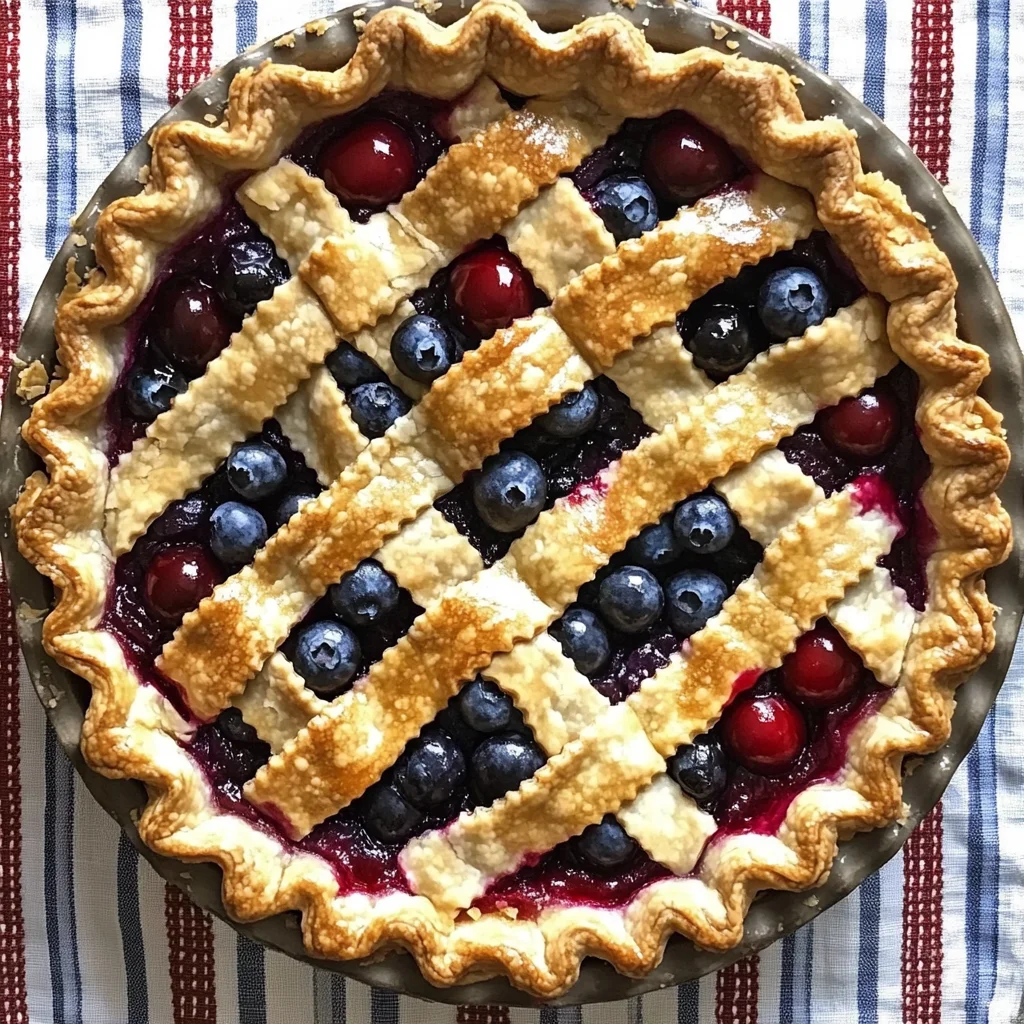
Cherry and Blueberry Pie: A Sweet Symphony of Summer Fruits
This delightful recipe brings together two beloved fruits in an exquisite dance beneath a golden crust. With its vibrant colors and irresistible flavor combination, this Cherry and Blueberry Pie is sure to capture hearts—and taste buds!
Ingredients:
As we begin our journey into pie-making, let’s take a moment to appreciate each ingredient that plays an essential role in crafting this delicious masterpiece.
-
1 refrigerated pie crust – The foundation of our pie is crucial because it provides structure while delivering that delightful buttery flavor we all crave. When choosing your pie crust, look for one made with quality ingredients—this will make all the difference in texture and taste. If you’re feeling adventurous, consider making your own from scratch! However, using refrigerated dough saves time without sacrificing flavor.
-
1 cup Daisy Sour Cream – This ingredient may seem unusual for a pie filling, but trust me on this—it adds an incredibly rich creaminess that balances out the sweetness of the fruits beautifully. Sour cream lends moisture as well as a slight tanginess that enhances the overall flavor profile. Make sure to use full-fat sour cream for optimal results; low-fat versions simply won’t provide the same luscious texture.
-
2 egg yolks, divided – Egg yolks are essential for enriching both the filling and giving our top crust that appealing golden color when baked. They act as a binding agent too, ensuring everything holds together beautifully. As you separate those yolks from the whites (save those whites for another use!), be gentle—this step is important for achieving the perfect consistency in your filling.
-
4 tablespoons sugar – Sugar isn’t just there to sweeten; it also helps to draw out moisture from both cherry and blueberry fillings, creating a beautiful syrupy mixture that will burst forth when you slice into your pie. When selecting sugar, I often prefer granulated sugar due to its versatility and ability to dissolve smoothly into the filling—but feel free to experiment with alternatives like coconut sugar if you’re looking for something different!
-
1 can cherry pie filling – Using canned cherry filling is convenient but do check labels for quality; you want cherries packed in natural juice rather than overly sugary syrups. The tartness from cherries adds depth to our dish while providing that familiar fruity essence we love so much.
-
1 can blueberry pie filling – Similar to cherry filling, blueberry filling contributes its own unique sweetness while keeping things vibrant! Look for blueberry filling made from real blueberries without artificial flavors or preservatives—you want those juicy bursts of berry goodness shining through!
-
1 tablespoon milk – The touch of milk combined with our remaining egg yolk will create an enticing glaze on top of our crust before baking. It gives our pie an attractive shine while also contributing to browning during baking—a visual cue we all appreciate!
Now that we’ve gathered our ingredients, let’s turn our attention to assembling this delectable creation!
Equipment You’ll Need:
Having the right tools at hand makes all the difference when diving into any culinary project! While they may not be ingredients, these pieces are essential partners in crafting something wonderful.
-
9-inch pie plate – This is where magic happens! A sturdy glass or ceramic plate not only showcases your beautiful creation but ensures even baking too—a must-have for achieving that flaky crust we dream about.
-
Rolling pin – This simple tool becomes your best friend as you roll out dough; its smooth surface allows you to apply even pressure without tearing or overworking the pastry.
-
Mixing bowl – A good-sized mixing bowl is indispensable for combining ingredients smoothly without splatter—trust me; you’ll want enough space!
-
Pastry brush – While optional, having one handy makes applying egg wash so much easier! A pastry brush helps achieve uniform coverage across your top crust resulting in an evenly browned finish.
-
Baking sheet – Placing your assembled pie on a baking sheet catches any drips during baking while also promoting even heating throughout—no one likes burnt edges or soggy bottoms!
Now armed with all our ingredients and tools, let’s dive into preparing this scrumptious Cherry and Blueberry Pie!
Step 1: Prepping Your Crust
Let’s kick things off by preheating your oven to a cozy 350 degrees Fahrenheit—this sets us up perfectly for baking bliss ahead! Next comes rolling out your first refrigerated pie crust; gently unroll it onto a lightly floured surface using your trusty rolling pin until it’s about an eighth-inch thick (don’t rush this step!). Carefully place it into an ungreased 9-inch pie plate—ensure there are no tears or cracks as these could lead to leaks later on! Trim any excess edges neatly while saving some dough for decorative elements later on.
Step 2: Creating Our Luscious Filling
In another bowl (yes—grab that mixing bowl!), combine Daisy Sour Cream along with two egg yolks (remember those precious ones we saved!) along with four tablespoons of sugar until everything melds seamlessly together—this creamy base is vital for ensuring every bite is rich yet balanced against fruity goodness! Once blended beautifully, spread this mixture evenly across the bottom of your prepared crust before layering spoonfuls of cherry filling over two-thirds followed by blueberry filling on one-third—the contrast creates such visual appeal!
Step 3: Decorating Our Pie
Now comes my favorite part—decorating! Roll out your second pie crust similarly as before but have fun shaping it however feels right—whether braided edges or lattice patterns—the possibilities are endless! Once crafted into artful shapes atop our filled base layer, mix up one remaining egg yolk with milk then brush generously across these decorative pieces—this glaze ensures they emerge golden-brown perfection once baked.
Step 4: Baking To Perfection
With preparations complete, place your adorned masterpiece onto a baking sheet (to catch drips) before sliding it into that preheated oven where aroma will soon fill every corner of your home! Bake away for approximately 60–70 minutes until bubbling juices peek through cracks & golden brown tops beckon invitingly—it’s crucial here not only check progress halfway through but cover exposed edges if browning too quickly!
The anticipation may feel unbearable now—but trust me; allow cooling time afterward which helps set flavors wonderfully before digging into slices warm straight from oven…
Stay tuned as we unravel more steps leading us closer towards enjoying this enchanting Cherry & Blueberry Pie experience together!
Step 5: Layering the Flavors with Precision
Once you’ve spread that delightful sour cream mixture over the bottom crust, it’s time to bring the magic of fruit to life. Take a moment to appreciate the vibrant colors of your cherry and blueberry fillings—deep ruby reds and sapphire blues that promise a symphony of flavors in every bite. Start by spooning the cherry pie filling generously over two-thirds of your crust. Use a spatula to evenly distribute it, ensuring that each slice will be bursting with sweet-tart cherries. Then, on the remaining one-third, carefully dollop the blueberry filling; these little dark jewels are not just beautiful but offer a slightly different texture and taste, adding layers of complexity to your pie. The combination is truly extraordinary!
Why do we layer like this? Well, it’s all about balance. The cherries bring their own tartness while the blueberries contribute a subtle sweetness. This duality is what makes each forkful not just satisfying but an adventure for your taste buds. Trust me on this when I say that even though this step might seem simple, it’s absolutely paramount in creating a pie that will leave everyone asking for seconds. The flavors meld beautifully during baking, so don’t rush—take your time here!
Step 6: Crafting the Top Crust with Love
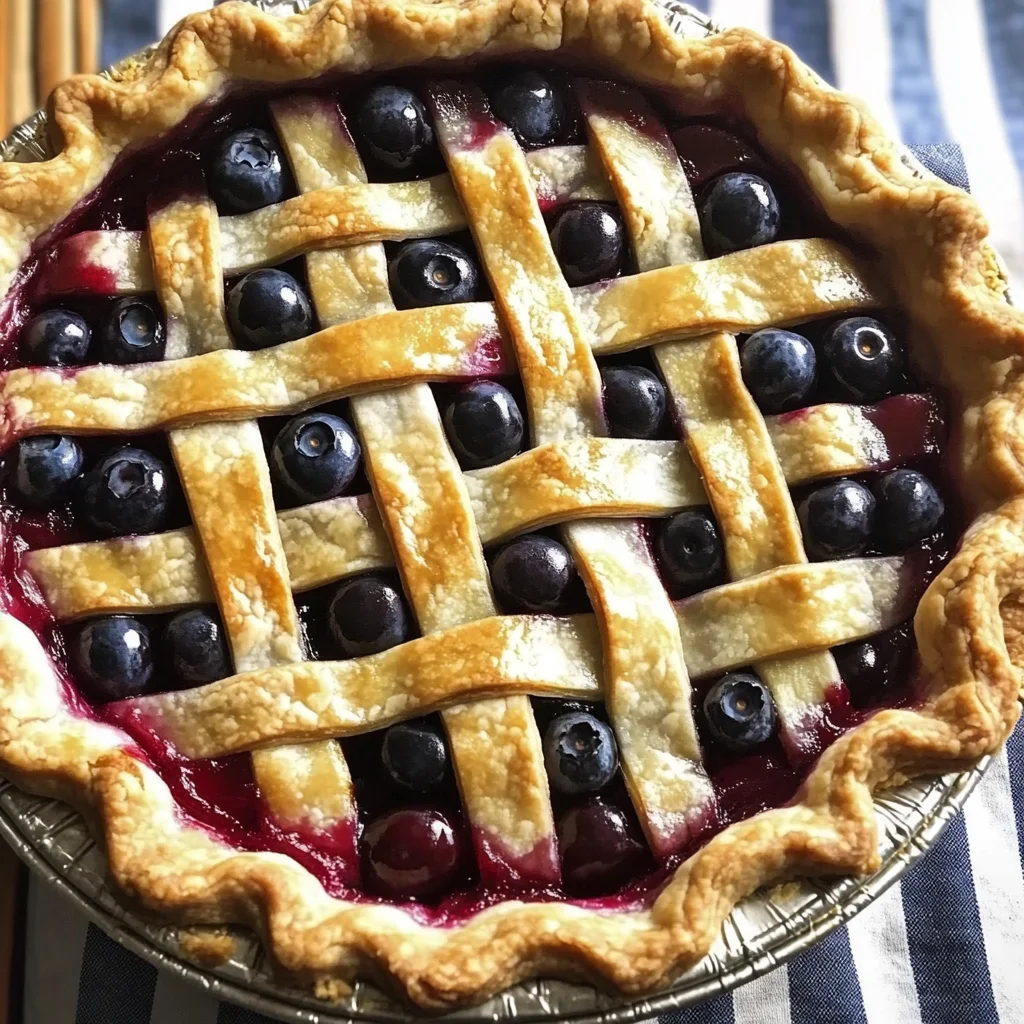
Now, let’s turn our attention to that second pie crust you rolled out earlier. This is where you can truly let your creativity shine! Whether you choose to cut it into classic strips for a lattice design or opt for a full cover with an elegant venting pattern, remember that this top layer serves both function and flair. A well-vented crust allows steam to escape during baking, preventing any sogginess beneath and providing that perfectly crisp finish we all crave. Whichever design you choose, make sure to press down gently at the edges to seal in all those glorious fruity fillings.
Once you’ve shaped your top crust, we need to prepare an egg wash using one egg yolk mixed with a splash of milk—this is where our pie starts to get its gorgeous golden hue as it bakes! With a clean brush (or even your fingers, if you’re feeling adventurous), apply this mixture generously over the entire surface of the crust. Not only does this wash give your pie its beautiful color; it also helps create a deliciously crispy texture when baked. Remember, visual appeal is just as important as flavor when it comes to dessert!
Step 7: The Baking Process – Patience is Key
With everything assembled beautifully, it’s time for our Cherry and Blueberry Pie to take center stage in the oven! Preheat your oven to 350 degrees Fahrenheit—a temperature that provides just enough warmth for our pie to cook evenly while allowing those luscious fruit fillings to bubble away without burning the crust too quickly. Place your pie on a baking sheet; this is not just for convenience but also serves as insurance against any potential overflow during baking—trust me, no one wants sticky drips on their oven floor!
Bake for about 60-70 minutes; however, keep an eye on it after the first 30 minutes have passed. At this point, check how golden and bubbly things are getting. If you notice that the edges of your crust are starting to brown too quickly (which can happen depending on your oven), simply cover them gently with foil—this step is crucial! We want a perfectly baked pie without burnt edges. When done, you should see those fruit juices bubbling up through any vents in your top crust; they’ll appear as glistening little bubbles of liquid gold.
Step 8: Cooling – Embrace the Wait
Ahh—the moment we’ve all been waiting for! But hold on just a bit longer because cooling our Cherry and Blueberry Pie is essential in achieving perfect slices later on. After removing it from the oven (and don’t forget those oven mitts!), allow it to cool on a wire rack at room temperature for about one hour before cutting into it. I know waiting can feel torturous when you’re surrounded by such intoxicating aromas wafting through your kitchen—but trust me here: this step transforms everything.
Cooling allows the filling to set properly rather than spilling out all over when you slice into it later. This process isn’t just about patience; it’s about letting those flavors deepen and meld together even more beautifully post-bake. As tempting as it may be to dive right in after pulling it from the oven, I promise you’ll thank yourself later when every slice holds its shape and delivers an utterly satisfying bite!
Conclusion:
As we wrap up our delicious journey through making this Cherry and Blueberry Pie together, I hope my excitement has inspired you just as much as this recipe has inspired me over the years! There’s something truly extraordinary about how these vibrant fruits meld together—a symphony of flavors bursting forth from each slice. The tangy cherries dance gracefully with the sweet blueberries while that creamy sour cream base adds an utterly intoxicating depth. It’s these key flavor combinations that elevate this dessert beyond ordinary pies; it’s not just food—it’s an experience filled with warmth and comfort.
Why should this recipe be on your must-try list? Well, aside from its mouthwatering taste, there’s an undeniable joy that comes from creating something so beautiful with your own two hands. Whether it’s a family gathering or just a cozy evening at home, imagine pulling it from the oven, letting everyone marvel at its golden crust before diving into a slice still warm from baking—what could be more heartwarming? Each bite becomes not just about satisfying hunger but sharing memories over laughter and stories passed down through generations.
When serving this pie, consider pairing it with something equally enchanting—imagine savoring a slice alongside a scoop of creamy vanilla ice cream that melts gently into the fruit filling or perhaps drizzling some warm chocolate sauce over top for an indulgent twist! For an afternoon pick-me-up with friends, serve small slices alongside freshly brewed coffee or tea; their warmth complements the pie’s sweetness beautifully. And don’t forget about whipped coconut cream as an alternative topping—its lightness adds another layer of delight!
Feeling adventurous? This recipe is wonderfully adaptable! You could swap out blueberries for raspberries or even toss in some peach slices during cherry season for a twist on classic flavors. Try adding spices like cinnamon or nutmeg for warmth or even citrus zest for brightness; each variation enhances what makes this dish so special while allowing your creativity to shine. So go on—give this recipe a try! I can’t wait to hear all about your experiences making it—and remember to cherish every moment spent baking because food has an incredible way of bringing us all closer together.
Cherry and Blueberry Pie
- Total Time: 1 hour 35 minutes
- Yield: Serves 8
Description
Indulge in the delightful experience of our Cherry and Blueberry Pie, a celebration of summer flavors that brings together the tartness of cherries and the sweetness of blueberries in a perfectly flaky crust. This pie is more than just dessert—it’s a nostalgic trip down memory lane, ideal for gatherings or cozy evenings at home. Each slice reveals vibrant colors and a symphony of tastes, making every bite an adventure. The creamy filling enhances the fruits’ natural sweetness, creating a comforting treat that’s sure to impress family and friends alike. Roll up your sleeves and get ready to create a delicious masterpiece that will fill your home with irresistible aromas!
Ingredients
- 1 refrigerated pie crust
- 1 cup sour cream
- 2 egg yolks
- 4 tablespoons sugar
- 1 can cherry pie filling
- 1 can blueberry pie filling
- 1 tablespoon milk
Instructions
- Preheat oven to 350°F (175°C).
- Roll out the refrigerated pie crust and place it in a 9-inch ungreased pie plate.
- In a mixing bowl, combine sour cream, egg yolks, and sugar until smooth. Spread this mixture over the bottom of the prepared crust.
- Layer cherry filling over two-thirds of the crust, followed by blueberry filling on one-third.
- Roll out the second pie crust for the top design; create vents for steam to escape.
- Brush with egg yolk mixed with milk to achieve golden color.
- Place on a baking sheet and bake for 60-70 minutes until juices bubble through vents.
- Allow cooling for about an hour before slicing.
- Prep Time: 25 minutes
- Cook Time: 70 minutes
- Category: Dessert
- Method: Baking
- Cuisine: American
Nutrition
- Serving Size: 1 slice (125g)
- Calories: 290
- Sugar: 20g
- Sodium: 150mg
- Fat: 12g
- Saturated Fat: 5g
- Unsaturated Fat: 7g
- Trans Fat: 0g
- Carbohydrates: 41g
- Fiber: 2g
- Protein: 4g
- Cholesterol: 65mg

Leave a Comment