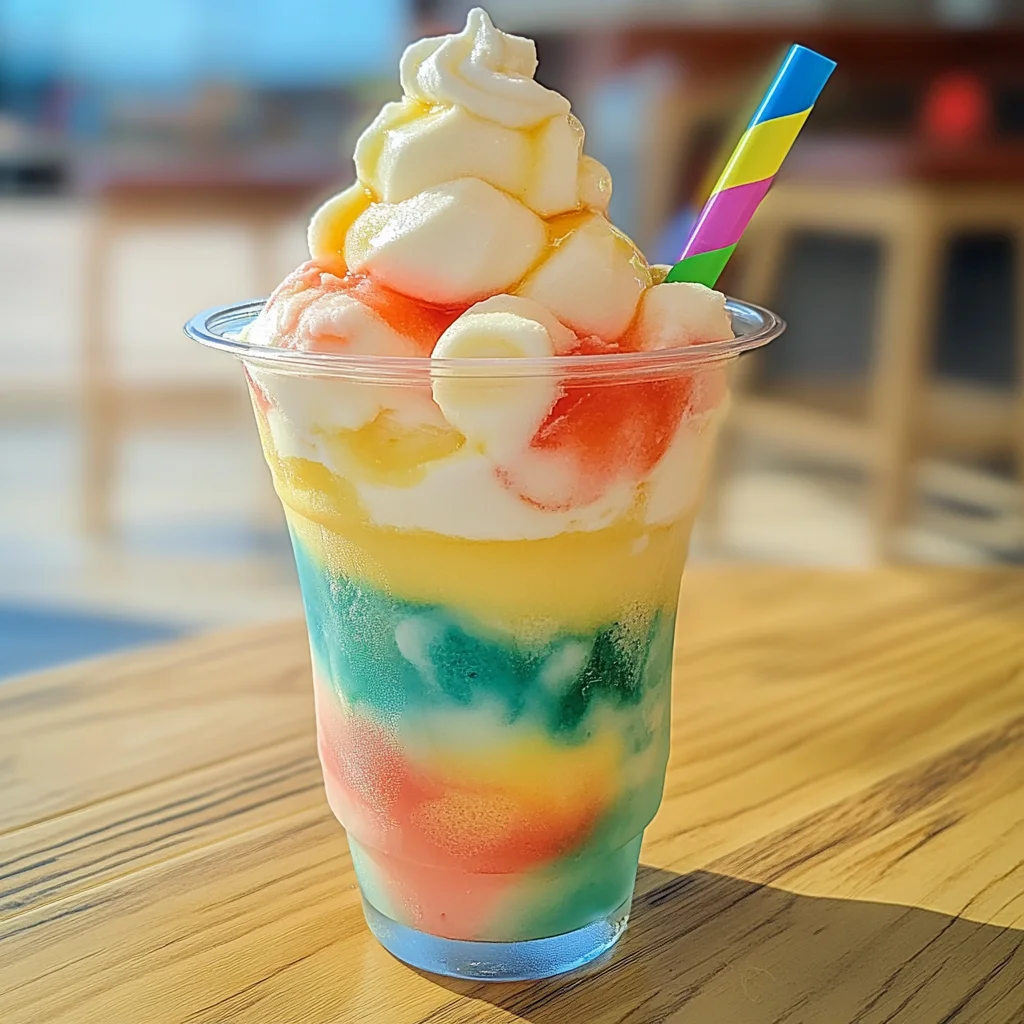
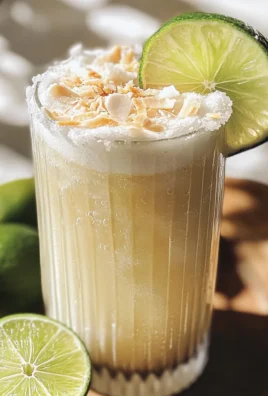
There’s something truly magical about the Rainbow Island Float. Picture this: a vibrant concoction that seems to capture the essence of summer, brimming with playful colors and delightful textures. It’s not just a drink; it’s an experience that transports you to a sun-kissed beach where laughter dances in the air and the sound of waves lapping at the shore fills your ears. This float is a perfect blend of creamy coconut, fruity rainbow sherbet, and fizzy soda—all swirling together in a glass like a tropical celebration waiting to take place. Every sip is a joyful burst of flavors that brings back those carefree childhood memories while also delighting your adult palate. I promise you, once you try this Rainbow Island Float, it will become your go-to treat for any sunny day or special gathering.
What makes this recipe even more special is its versatility—whether you’re hosting a lively summer party or simply looking for a fun way to cool off on a hot afternoon, this float fits right in. The beauty of the Rainbow Island Float lies not only in its taste but also in its stunning presentation. Those eye-catching layers create a visual feast that’s bound to impress anyone lucky enough to share it with you. And whether you choose to make it as an indulgent cocktail or keep it alcohol-free as a delightful mocktail, each sip offers an utterly intoxicating experience that is both refreshing and satisfying. Trust me when I say that this drink isn’t just about quenching your thirst; it’s about creating moments of joy and connection with those around you.
Rainbow Island Float: A Tropical Delight in Every Sip
Let’s dive into making this beautiful Rainbow Island Float together! Imagine scooping vibrant rainbow sherbet into your glass, watching it melt slightly under the creamy coconut milk before being topped off with fizzing lemon-lime soda and fluffy whipped cream—what’s not to love? This beverage invites creativity; feel free to use different flavors of sherbet or even add fresh fruit if you’re feeling adventurous. The best part? It’s simple enough for anyone to whip up yet impressive enough to wow your friends and family. So grab your ingredients, and let’s embark on this colorful culinary journey!
Ingredients:
As we gather our ingredients, think of them as the essential notes in a symphony—each plays its part in creating that delightful melody of flavors found in our Rainbow Island Float.
- 2–3 scoops rainbow sherbet: This is the star of our show! The rainbow sherbet brings an explosion of fruity flavors—from zesty orange to sweet raspberry—creating layers of taste that dance on your palate. When choosing your sherbet, look for vibrant colors and real fruit flavor rather than artificial additives; this will elevate your float from ordinary to extraordinary! If you’re feeling adventurous, consider making homemade sherbet using fresh fruits for an even more personal touch.
- 1 oz Malibu vanilla extract (alcohol-free): If you’re opting for a cocktail version, this ingredient adds a luxurious twist without the alcohol! The Malibu vanilla extract infuses comforting warmth with its sweet aroma and enhances the overall flavor profile. However, if you’re leaning towards the mocktail option, feel free to skip this step—your float will still be deliciously creamy and refreshing without it.
- ½ cup lemon-lime soda (like Sprite): This fizzy element introduces effervescence and sweetness that complements our creamy base perfectly. The carbonation creates an enchanting bubbling effect when poured over the sherbet, which adds visual appeal while giving each sip a refreshing lift. Make sure to use chilled soda so it doesn’t melt your beautiful layers too quickly!
- ½ cup coconut milk or coconut cream: Here lies our creamy foundation! Coconut milk or cream lends velvety richness and tropical vibes—the kind that makes you feel like you’re lounging under palm trees. Opting for coconut cream will give you an even thicker texture if that’s what you’re after; just remember that both options are wonderful choices depending on how decadent you’d like your float to be.
- Whipped cream: Ahh, whipped cream—the crowning glory! This fluffy topping adds an indulgent finish that contrasts beautifully with the icy ingredients below. Whether you whip it fresh or use store-bought is entirely up to you; both versions can elevate your float into something truly special.
- Mini paper umbrella or rainbow straw for garnish: These whimsical touches aren’t just decorative—they’re essential for setting the mood! A mini umbrella evokes images of beachy vacations while adding a splash of fun; meanwhile, using a rainbow straw enhances the playful nature of our float. Don’t skip these thoughtful details—they make every sip feel like an occasion!
Equipment You’ll Need:
Now that we have our ingredients ready, let’s talk about the tools we’ll need—these trusty companions will help us craft our delightful beverage seamlessly.
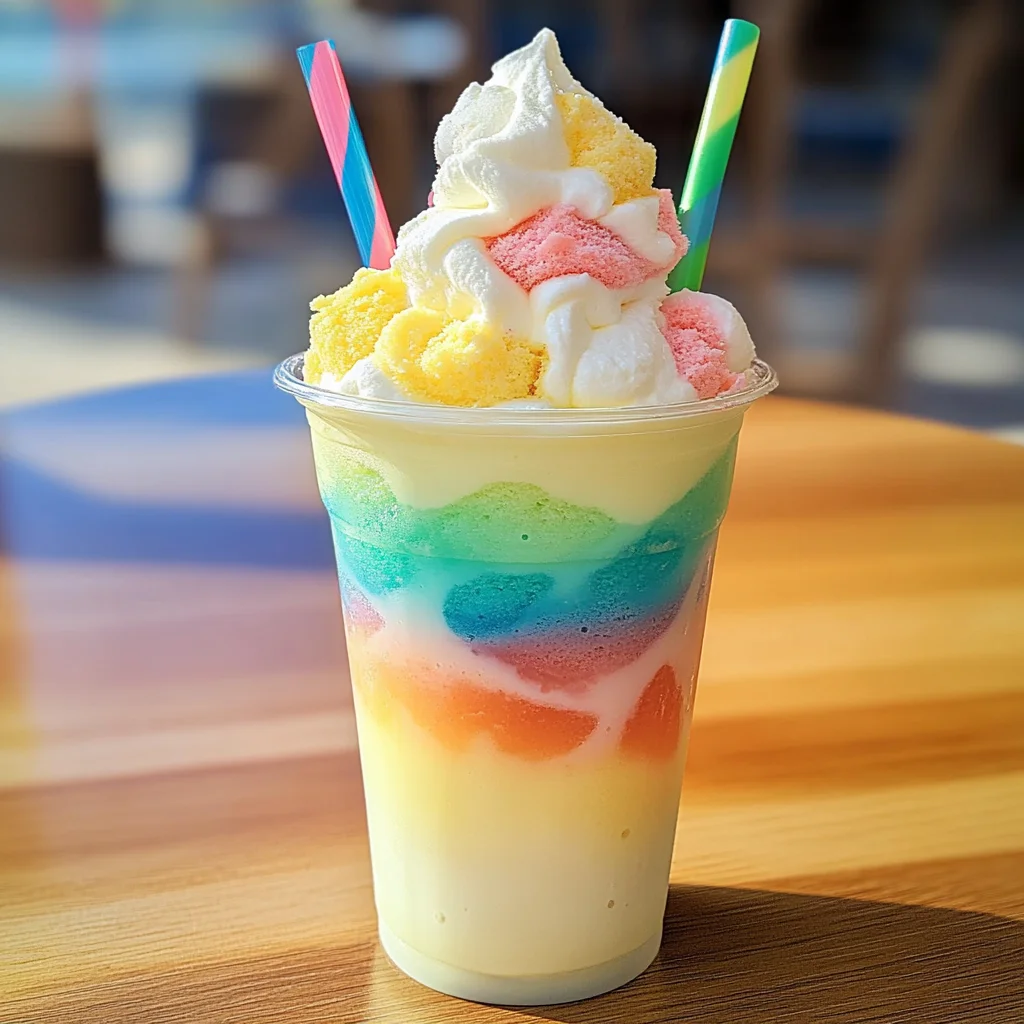
- Tall glass or float glass: Using a tall glass not only showcases those beautiful layers but also gives ample room for all those delicious ingredients we’re about to stack up. A float glass often has extra height which makes it easier to enjoy every layer without spilling over—a non-negotiable when enjoying something as fabulous as our Rainbow Island Float!
- Spoon: A simple spoon becomes essential here—not only will it help us scoop out our vibrant rainbow sherbet effortlessly but it’ll also assist in mixing everything together once we’ve layered our ingredients perfectly.
- Freezer: While technically not equipment per se, don’t underestimate the power of chilling! Pop your glasses into the freezer before serving; this little trick ensures every sip remains icy cold and refreshing—a crucial aspect when crafting such a delightful float!
Now armed with these lovely ingredients and tools, let’s get ready for some fun as we prepare our gorgeous Rainbow Island Float!
Preparing the Rainbow Island Float
Step 1: Chill Your Glass
Before diving into assembling this masterpiece, we want our glass frosty-cold—a crucial step that enhances every sip’s refreshing quality! Place your tall glass or float glass into the freezer for about 10–15 minutes before beginning any other steps. I promise you’ll notice how much more enjoyable each component feels when they meet inside an icy vessel—this prevents unwanted melting and keeps everything beautifully layered just how we want it!
Step 2: Layer the Base
Once you’ve achieved that perfect chill on your glass, it’s time for one of my favorite parts—layering in those colorful scoops of rainbow sherbet! Carefully add 2–3 generous scoops directly into your chilled glass; don’t rush through this process because each scoop contributes its own unique flavor profile and color element. As they nestle together at the bottom like friends sharing secrets at sunset—their hues blending ever so slightly—it builds anticipation for what’s next.
Step 3: Add Coconut
Next comes one of my personal favorite elements—the silky smooth coconut milk or cream! Pour it gently over the rainbow sherbet scoops; watch as its lusciousness begins swirling around each scoop marvelously. This step is pivotal because allowing them time together lets their flavors mingle harmoniously while creating stunning visual swirls throughout—that comforting aroma wafting through reminds me why I love cooking so much! Remember to pour slowly so as not to disrupt those precious layers we’ve just built.
Step 4: Spike or Skip
If you’re preparing a cocktail version today (or treating yourself!), now’s when you’ll drizzle in some Malibu vanilla extract (the alcohol-free kind). Just imagine how magnificent those warm vanilla notes will enhance every bite—it adds depth without overpowering all those fruity elements already present! However, if you’ve chosen to stick strictly with kid-friendly mocktails today (which are equally delightful), feel free to skip this step altogether—you won’t miss out on any fun flavors!
I hope these first few steps have stirred excitement within you because we’re not done yet! Stay tuned as we continue building upon all these fabulous components until we finally create this splendid Rainbow Island Float worthy of celebration!
Step 5: Chill Your Glass to Perfection
Ah, the magic of a frosty glass! I can’t stress enough how crucial this step is in creating your Rainbow Island Float. By placing a tall glass or float glass in the freezer for about 10–15 minutes, you’re not just cooling it down; you’re setting the stage for an absolutely stunning presentation that will rival any tropical paradise. When you pour your concoction into a chilled vessel, you’ll notice how beautifully the layers stay distinct and vibrant, rather than blending into one another too quickly. This visual separation is what makes each sip a delightful surprise, revealing new flavors as you go. Plus, nothing beats that initial icy touch to your lips when you take your first sip—it’s like a small wave of refreshment crashing over you.
While your glass chills, take this moment to revel in the anticipation of what’s to come. Imagine how the colors will dance together as you build your float. Trust me on this—don’t rush through this step! A properly chilled glass ensures that every element stays cool longer, enhancing both flavor and texture. You want to savor each sip without the ice melting too fast and diluting your rainbow creation. So take a deep breath, set a timer if you need to, and let that glass get real cozy in the freezer!
Step 6: Layering the Base with Rainbow Sherbet
Now comes the fun part—layering in those vibrant scoops of rainbow sherbet! Grab your chilled glass and scoop out 2–3 generous servings of this colorful delight directly into the base. As you do this, watch as those bright swirls of color create a cheerful backdrop for what’s about to unfold. The rainbow sherbet isn’t just visually stunning; it’s also packed with flavor that melds perfectly with the creamy coconut milk we’ll add next. Each bite offers a balance between fruity sweetness and a slight tanginess that pairs beautifully with the rich coconut.
Why layer? Well, layering helps maintain those beautiful colors and textures that make your float so special. If you dump everything in at once, you risk losing that spectacular visual appeal—and let’s be honest: we eat with our eyes first! Take care as you add each scoop; try using an ice cream scoop or a large spoon for ease and control. Look for those vibrant hues—the pinks, greens, yellows—that remind you of sun-soaked beaches and carefree days. Each layer brings its own unique flavor profile to the party, creating an unforgettable experience with every spoonful.
Step 7: Introducing Coconut Creamy Goodness
With your rainbow sherbet nestled cozily in its frosty abode, it’s time to pour in the star of our tropical show—coconut milk or coconut cream! Carefully drizzle about half a cup over the sherbet while allowing it to swirl around those lovely scoops. The key here is to pour slowly! This technique lets the coconut intertwine with the sherbet without completely submerging it right away; instead of merging into one uniform mass, they’ll create an exquisite marbled effect that looks just as good as it tastes.
Coconut milk is truly a versatile ingredient; its creamy richness adds another layer of indulgence while enhancing that tropical vibe we’re after. But don’t just take my word for it—experience how it transforms your float! As you pour, pay attention to how it interacts with the sherbet; you’ll see little wisps of color dancing with creamy white waves. This step is absolutely paramount because it lays down an essential foundation for our fizzy topping later on—think of it as building a luxurious beachside villa before inviting guests over for cocktails!
Step 8: Fizz It Up Like Never Before
Now for one of my favorite moments—the fizz! Gently pour half a cup of lemon-lime soda over your layered masterpiece. As soon as it hits that creamy coconut layer mixed with rainbow sherbet, you’ll witness an effervescent eruption reminiscent of fireworks on New Year’s Eve! The soda will foam and bubble vigorously; don’t be alarmed—this is exactly what we want! The carbonation lifts everything up and creates that intoxicating floaty effect which gives our drink its name.
Why is this step so vital? Well, you’re not just adding bubbles; you’re infusing life into your Rainbow Island Float! The fizziness adds excitement and refreshment while cutting through some of the richness from earlier layers—a perfect balance between creamy indulgence and bubbly bliss. Just be sure to pour slowly down the side of the glass or use a spoon to deflect some bubbles if necessary; this will help keep everything nice and pretty instead of overflowing all over your countertop (trust me—you don’t want a sticky mess!). Enjoy watching as flavors mingle together before your eyes; it’s like watching a work of art come alive!
Next Major Phase – Final Touches
As we approach the end of crafting our Rainbow Island Float masterpiece, let’s focus on those final touches that take this delightful beverage from fantastic to truly extraordinary.
Step 9: Whipped Cream Wonderland
What could possibly enhance our already vibrant float? A generous swirl of whipped cream on top! Using either whipped cream from a can or freshly whipped cream made from plant-based alternatives (I love using coconut whipped cream), top off your float with ample dollops that spill joyfully over the sides. This fluffy cloud isn’t just for looks—it adds an airy lightness that complements all those bold flavors underneath while offering contrast against their rich textures.
Why are we topping it off now? Whipped cream serves multiple purposes here: it provides that quintessential ‘float’ aesthetic while also introducing another flavor dimension—sweetness without heaviness! The lightness cuts through all those layers beautifully and invites everyone around you to dive right in—it beckons them closer like summer sunshine beckons us outside after winter’s chill. You deserve every fluffy bite atop this tropical treat so don’t hold back!
Step 10: Garnish Like You Mean It
Finally, let’s elevate our presentation even further by adding some playful garnishes—a mini paper umbrella or vibrant rainbow straw will do wonders here! These finishing touches aren’t merely decorative; they bring out childlike joy—after all, who doesn’t feel giddy at sighting such fun additions? It signals celebration—a signal that says “Indulge!” Place them gently atop your whipped cream mountain like happy flags marking victory on our culinary journey.
As you prepare to serve this beauty immediately (trust me—you want everyone enjoying their floats while they’re icy cold), take one last look at all those dazzling colors layered within—and remember: every sip is filled not only with delicious flavors but also memories waiting to be created among friends or family gathered around sharing laughter together under sunny skies.
So there you have it—the complete guide to crafting your very own Rainbow Island Float!!! I hope you’re as excited as I am because what awaits is not just a drink but an experience—a symphony composed from fresh ingredients harmonizing together into something utterly intoxicating yet profoundly satisfying at every turn! Enjoy making these gorgeous floats—you won’t regret diving headfirst into such colorful creativity!
Storage and Enjoyment Tips for Your Rainbow Island Float
Now that your Rainbow Island Float is ready to be enjoyed, let me tell you how to savor every delightful drop and ensure that any leftovers remain just as heavenly! When it comes to this vibrant treat, the key is in the presentation and the preservation. If you’ve had a bit too much fun with your float or simply want to save some for later (I know, it’s hard to resist!), here are some tips to keep that tropical magic alive.
Storing Leftover Rainbow Island Float
If you find yourself with leftover Rainbow Island Float, first of all, let’s be honest—it’s probably going to be a challenge! But if you do have some left (perhaps due to sheer generosity), transfer it into an airtight container. It’s best to use a glass or plastic container with a secure lid, ensuring it’s stored in the freezer. This float can generally keep well for about 3 days, but trust me when I say it tastes best fresh! To maintain its delightful texture and avoid icy crystals forming on top, try placing a piece of wax paper directly on the surface before sealing it up. This little trick works wonders! When you’re ready to indulge again, simply scoop out what you need; it might be slightly firmer than when freshly made but still packed with flavor. If you desire, you could even pop it back into a chilled glass and add a splash more soda for that fizzy just-made experience!
Freezing Components for Later
If you’re planning ahead or want to enjoy this indulgence over time without compromising flavor, consider freezing components separately! You can freeze scoops of rainbow sherbet in an airtight container for up to 1 month—just line the container with parchment paper to help preserve its bright colors and textures. For the coconut milk or cream, pour it into ice cube trays; once frozen solid, transfer those cubes into a zip-top bag where they can last about 2-3 months. The beauty of this method is that whenever you’re craving a taste of summer—or maybe just need a cheerful pick-me-up—you can pull out these frozen delights! Simply blend together the sherbet and coconut cubes with your fizzy soda when you’re ready, and voilà—your own mini tropical escape at home!
What’s not to love about having such a refreshing treat waiting for you?
Rainbow Island Float
- Total Time: 10 minutes
- Yield: Serves 2
Description
Dive into deliciousness with our Rainbow Island Float – a colorful blend of creamy coconut and rainbow sherbet that’s perfect for any occasion!
Ingredients
- 2–3 scoops rainbow sherbet
- ½ cup coconut milk or coconut cream
- ½ cup lemon-lime soda (like Sprite)
- Whipped cream for topping
- Mini paper umbrella or rainbow straw for garnish
Instructions
- Chill your glass in the freezer for 10–15 minutes.
- Scoop 2–3 generous servings of rainbow sherbet into the chilled glass.
- Pour ½ cup of coconut milk or cream over the sherbet.
- Slowly add ½ cup of lemon-lime soda on top.
- Finish with a swirl of whipped cream and garnish with a mini umbrella or straw.
- Prep Time: 10 minutes
- Cook Time: 0 minutes
- Category: Dessert
- Method: N/A
- Cuisine: N/A
Nutrition
- Serving Size: 1 float (300g)
- Calories: 330
- Sugar: 46g
- Sodium: 85mg
- Fat: 14g
- Saturated Fat: 10g
- Unsaturated Fat: 4g
- Trans Fat: 0g
- Carbohydrates: 53g
- Fiber: 1g
- Protein: 2g
- Cholesterol: 0mg
Leave a Comment