There’s something truly magical about the scent of freshly baked pie wafting through the house, don’t you think? The warm aroma of cinnamon mingles with the sweetness of caramelized apples, wrapping around you like a cozy blanket on a chilly evening. When I think of my Easy Dutch Apple Pie, I’m transported to cherished family gatherings where laughter fills the air and we all gather around the table, eager for a slice of that golden-brown goodness. This pie is more than just dessert; it’s an experience, a bridge connecting generations and traditions with every buttery flake of crust and each spoonful of spiced apple filling. I promise you, this delightful creation is not only a show-stopper but also incredibly easy to make, making it perfect for both seasoned bakers and those just starting their culinary adventures.
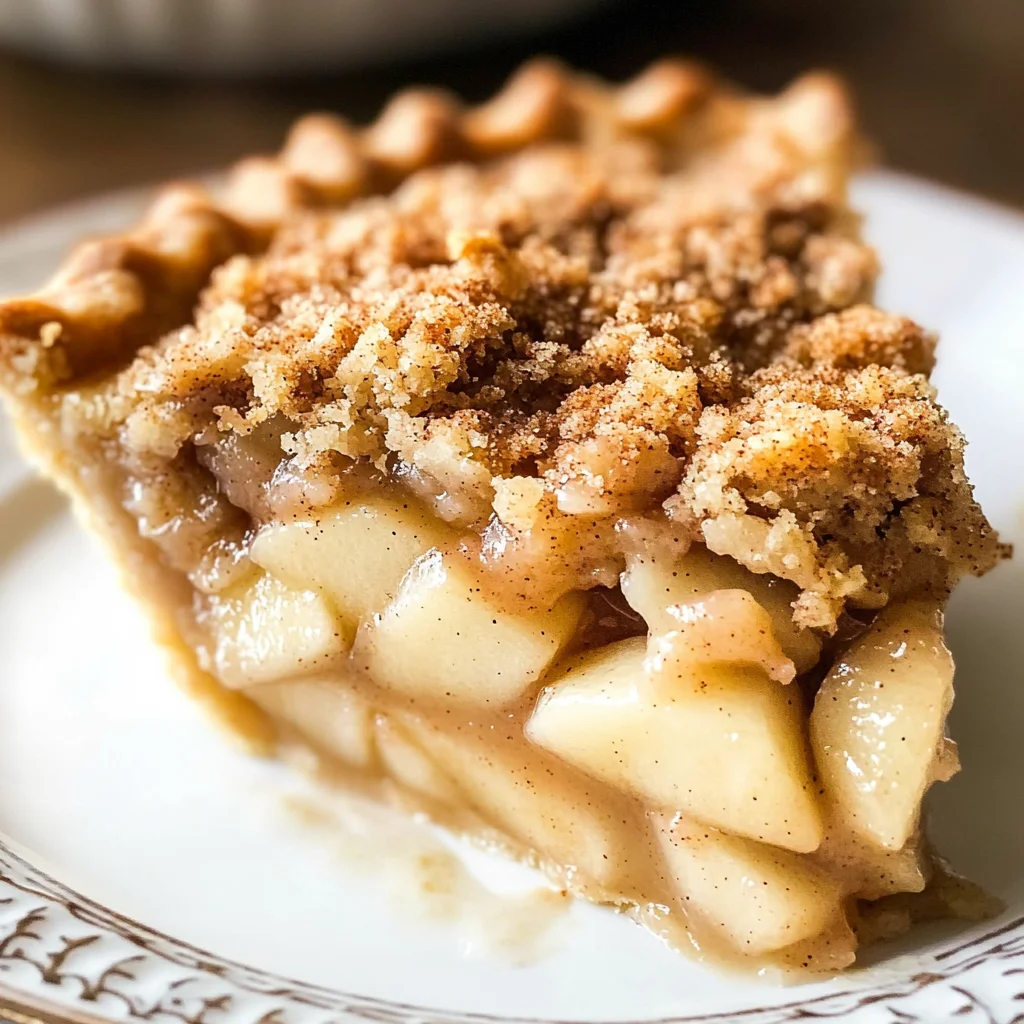
Now, let’s talk about why this recipe holds a special place in my heart. Dutch Apple Pie is known for its luscious apple filling topped with a crunchy, crumbly layer of brown sugar streusel that adds an utterly intoxicating texture contrast. The Granny Smith apples lend a perfect balance of tartness against the sweetness of the sugars, creating a symphony of flavors that dances on your palate. And let’s be real: who can resist that irresistible topping? It’s like a hug from Grandma wrapped in flaky pastry! Whether you’re hosting Thanksgiving dinner or simply treating yourself on a Wednesday afternoon, this Easy Dutch Apple Pie is sure to bring warmth and joy to any occasion.
Easy Dutch Apple Pie: A Slice of Comfort
As we dive into this delightful recipe together, I want you to feel empowered and excited. Baking should be fun and rewarding! With just a handful of ingredients that you probably already have in your pantry, we’ll create something truly extraordinary. Trust me when I say your friends and family will rave about this pie long after it’s gone. So grab your apron; it’s time to embark on this delicious journey!
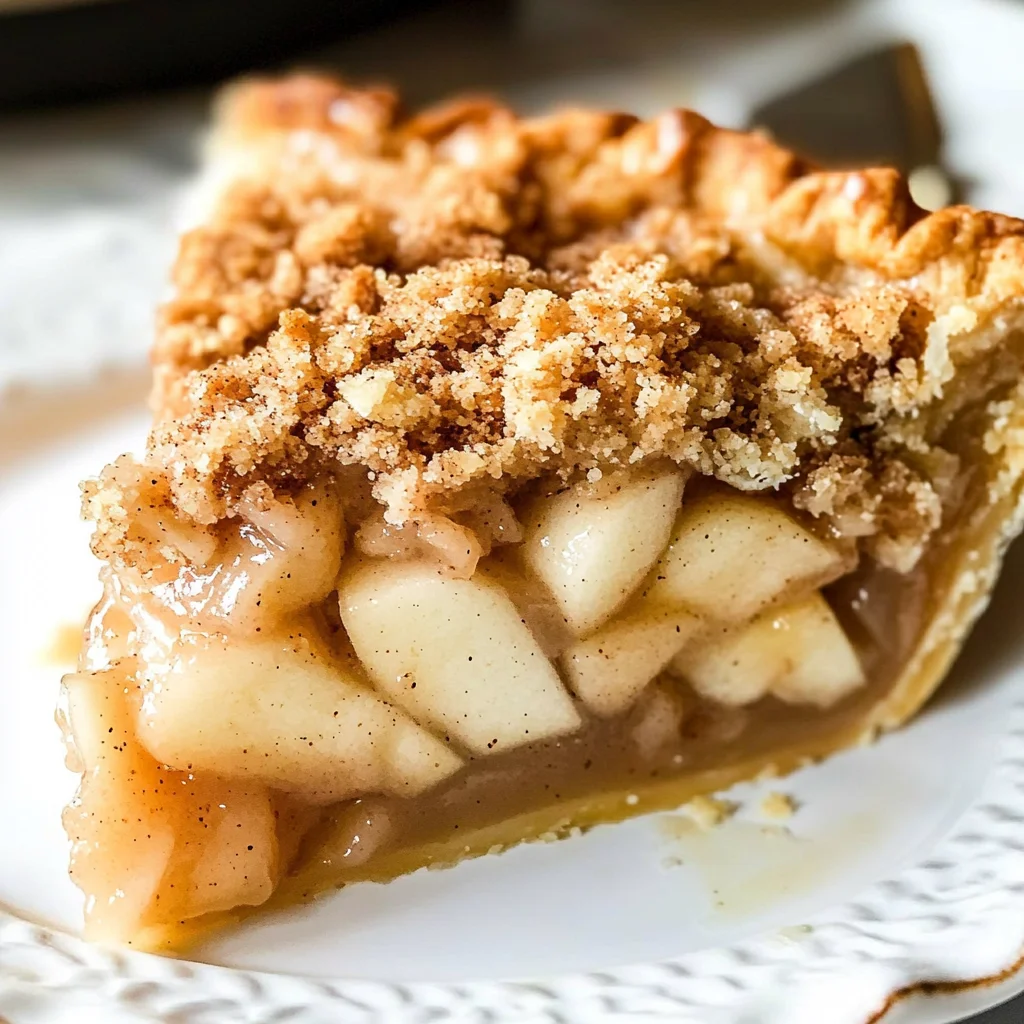
Ingredients:
Before we start whipping up magic in the kitchen, let’s gather our ingredients. Each one plays a pivotal role in crafting the perfect Easy Dutch Apple Pie that will have everyone asking for seconds!
-
1 unbaked 9-inch pie crust – The foundation of our pie! You can choose to make your own crust from scratch (which is incredibly rewarding) or opt for a store-bought version if you’re short on time. If you go homemade, remember that chilling your dough is absolutely paramount; it helps maintain its structure while baking and ensures that lovely flaky texture we all adore.
-
1 cup (120g) all-purpose flour – This ingredient serves as the backbone not only for our streusel topping but also contributes to the structure of the pie crust itself. All-purpose flour has just the right balance of protein for both tenderness and strength—too much protein can lead to toughness, which we definitely want to avoid!
-
½ cup (100g) granulated sugar – Sweetness is essential here as it enhances the natural sugars found in our apples. Plus, it helps create that lovely caramelization during baking which adds depth to flavor. If you’re trying to cut back on refined sugars, feel free to swap some out with coconut sugar or another alternative.
-
½ cup (100g) lightly packed brown sugar – This brings an additional layer of flavor thanks to its molasses content; brown sugar offers hints of caramel that complement our apple filling beautifully. Ensure it’s lightly packed so you don’t end up with too much sweetness overwhelming our dish.
-
1 teaspoon ground cinnamon – Ahh, cinnamon—the spice that makes everything nice! This fragrant addition ties together our apple filling perfectly while evoking nostalgia with each bite. Don’t skimp on fresh spices; they pack more punch than those old jars sitting in your cabinet.
-
½ cup (112g) salted butter (softened) – Butter is crucial here—it not only contributes flavor but also creates an irresistible flaky texture in both crusts and toppings alike. Make sure it’s softened so it blends smoothly into your flour mixture; otherwise, you’ll end up with lumps instead of that dreamy crumble we’re after.
-
7 cups peeled and finely sliced Granny Smith apples (about 2½ pounds whole apples) – These iconic green beauties are tart yet sweet when baked, making them ideal for pies! Their firm texture holds up beautifully during cooking rather than turning mushy—a big plus for achieving perfect bites.
-
1 tablespoon lemon juice – A splash of lemon juice brightens up our apple filling by enhancing their natural flavors while preventing browning—a little acidity goes a long way here!
-
¼ cup (50g) granulated sugar – We’ll sprinkle this over our apple mixture to amplify their sweetness further without overpowering their tartness—the balance here is key!
-
¼ cup (50g) lightly packed brown sugar – Adding more depth with this second dose of brown sugar creates layers upon layers of flavor in every bite—think gooey caramel goodness!
-
3 tablespoons (23g) all-purpose flour – This will help thicken our filling as it cooks down nicely without becoming soupy—nobody wants flooding from their pie!
-
1 teaspoon ground cinnamon – Yes, we’re using cinnamon again because more is merrier when it comes to pairing apples! It helps build flavor complexity throughout each layer.
-
¼ teaspoon salt – Salt may seem like an odd addition in desserts but trust me—it enhances all other flavors present and brings out natural sweetness beautifully!
-
Pinch of ground nutmeg – Just a pinch adds warmth and depth—think cozy autumn evenings when you take your first bite into this sliceable delight.
Equipment You’ll Need:
Having the right tools at your disposal makes all the difference between an average baking experience and one filled with joy as you create something wonderful! These essential partners streamline everything from mixing ingredients seamlessly to ensuring even baking results:
-
Mixing bowls – A good set allows for easy combining without worrying about spills or messes! Look for bowls with non-slip bases if possible; you’ll appreciate them during vigorous mixing sessions.
-
Measuring cups & spoons – Precision matters here—you wouldn’t want guesswork involved when crafting such delectable delights! Invest in good-quality measuring tools since they ensure accuracy every time—after all, consistency leads us toward perfection.
-
Pie dish – Choose one that’s deep enough so that there’s room for all those beautiful layers! Glass or ceramic options are excellent choices as they distribute heat evenly while providing visual appeal when serving guests.
-
Pastry cutter or fork – These handy tools make cutting butter into flour effortless—don’t shy away from using them liberally; they help achieve that desired crumbly texture quickly!
Preparing the Easy Dutch Apple Pie
Step 1: Prepare Your Pie Crust
Let’s kick things off by preparing our pie crust because this step lays down the groundwork for everything else! If you’re using store-bought dough, simply roll it out into your greased pie dish according to package instructions—easy peasy! But if you’re feeling adventurous enough to make your own from scratch (and I highly encourage you!), start by combining flour and salt before cutting cold butter into small cubes—this process, known as “cutting-in,” should create pea-sized pieces throughout your mixture before adding ice-cold water gradually until combined effectively without overworking things! Remember: chilling both dough AND crust afterward can be crucial—it helps prevent shrinkage during baking while ensuring flakiness remains intact!
Step 2: Mix Up That Topping
Next up is arguably my favorite part—the streusel topping! In another bowl, combine flour with both sugars alongside cinnamon until blended well before cutting softened butter directly into these dry ingredients using either hands or forks until crumbly bits form throughout—a method called “squeeze-and-release.” Trust me; this step is important because it allows bits oozing melted goodness once baked atop perfectly spiced apples below—utterly intoxicating! Set aside while we prepare those delectable apple slices next…
Step 3: Slice Those Apples
Now onto slicing those beautiful Granny Smith apples! After peeling them carefully (you’ll want smooth skins removed), core each fruit before finely slicing them thinly so they cook evenly during baking—aiming around ¼ inch thickness should suffice here unless larger chunks suit personal preference better; however thinner slices generally yield softer results post-baking which pair wonderfully against crunchy topping textures above later on too… For best results chronicling flavors together: sprinkle lemon juice immediately after slicing so oxidation doesn’t dull vibrant colors on display later during presentation either…
Step 4: Create That Delicious Filling
Now comes time combining those freshly sliced apples together within one large bowl alongside granulated sugar(s), extra flour needed plus salt/cinnamon/nutmeg spices added too… Gently toss everything together until every single piece feels embraced by sweetness evenly throughout—that visual cue showing coated surfaces will indicate readiness once layered atop prepped crust waiting patiently below… Allow resting briefly allows juices seep through which enhances overall flavor profile substantially before loading onto base beneath…
I hope you’re feeling inspired because trust me—you’re going to love how this pie turns out! Let’s continue crafting magic together as we finish assembling our masterpiece soon…
Step 5: Preparing the Apple Filling
Now that we have our crust ready, it’s time to focus on the true stars of this Easy Dutch Apple Pie—the apples! Grab those Granny Smith beauties and begin peeling them. I absolutely adore these apples for their perfect balance of sweetness and tartness; they bring a delightful complexity to the pie. Once peeled, slice them thinly so they can cook evenly, aiming for about 1/8-inch thickness. This ensures that each slice melds beautifully with the others during baking, creating that lovely, tender texture we all crave in a pie. As you slice, keep an eye out for any bruised spots—just discard those.
Once you’ve sliced a whopping seven cups of apples (which is about two and a half pounds), toss them in a large mixing bowl with 1 tablespoon of fresh lemon juice. This step might seem simple, but it’s absolutely crucial! The lemon juice not only enhances the flavor but also prevents the apples from browning too quickly, keeping your filling vibrant and fresh. Next, add in 1/4 cup of granulated sugar and 1/4 cup of lightly packed brown sugar, along with 3 tablespoons of flour, 1 teaspoon of ground cinnamon, 1/4 teaspoon salt, and a pinch of nutmeg. Each ingredient plays its part; the sugars caramelize while baking to create that golden syrupy goodness, while the flour thickens the filling just enough to avoid a runny mess. Stir everything together gently—think of it as giving your apples a warm hug—until they are well-coated and utterly inviting.
Step 6: Crafting the Crunchy Topping
Now let’s dive into what truly makes this Dutch apple pie special—the topping! In another medium-sized bowl, combine 1 cup of all-purpose flour with ½ cup of granulated sugar and ½ cup of lightly packed brown sugar along with 1 teaspoon of ground cinnamon. This mix is where the magic happens; it transforms into an irresistible crumbly topping that adds that signature crunch to each slice. The combination of sugars will caramelize during baking, providing that beautiful golden color and rich flavor contrast to our tender apple filling.
Next comes the butter—remember that softened salted butter? Cut it into small chunks and add it to your dry ingredients. Using your fingers or a pastry cutter (or even two forks if that’s what you’ve got), work the butter into the flour mixture until it resembles coarse crumbs. This technique is known as “cutting in” butter; it’s essential because it creates little pockets of fat within your topping that will melt during baking, resulting in that dreamy texture we all love. Trust me on this—patience is key! Don’t rush; keep working until you see no large pieces of butter remaining. Each crumb should have a bit of character, which will create delightful crispy bits as they bake.
Step 7: Assembling Your Masterpiece
With both your apple filling and topping prepared, it’s finally time to assemble your pie! Preheat your oven to 375°F (190°C)—this will ensure it’s hot enough to give your pie that perfect golden crust right from the start. Roll out your unbaked pie crust into a beautiful circle if you haven’t done so already (don’t worry if it’s not perfect; rustic is charming!). Gently transfer this crust into a deep-dish pie pan—it should hang over slightly at the edges—that’s okay because we want room for all those glorious apples.
Layer those apple slices into your crust with care; I like to arrange them neatly because we eat with our eyes first! Once you’ve piled them high—in fact, don’t be shy here; mound them up high as they’ll shrink down during baking—spoon any remaining juices over top for added flavor. Now comes the fun part: sprinkle that crunchy topping generously over your apples until they are completely covered. It should resemble a cozy blanket on a chilly day—each crumb contributing to an utterly intoxicating experience once baked.
Step 8: Baking Your Perfect Easy Dutch Apple Pie
Slide your assembled masterpiece into the preheated oven and let it work its magic for about 60-65 minutes. You’ll know it’s time when you see bubbling juices oozing from underneath the topping—a visual cue so satisfying you’ll find yourself eagerly anticipating what’s to come! Keep an eye on it after around 50 minutes; if you notice the topping getting too dark before the apples are tender (the last thing you want is burnt crumbs!), simply cover it loosely with aluminum foil—this little trick helps diffuse some heat without sacrificing that gorgeous color you’ve worked so hard on.
During baking, the aroma wafting through your kitchen will be nothing short of heavenly—a symphony of cinnamon mingling with sweet apple notes will envelop you like a warm hug. If you’re unsure whether it’s done after an hour has passed (and trust me—you’ll want every bite perfectly cooked), use a fork or knife inserted near the center as your doneness test; it should glide through those apple slices without resistance when they’re ready. Once baked to perfection, allow your Easy Dutch Apple Pie to cool for at least an hour before slicing—it’s tough to wait, I know—but this cooling period allows those delicious juices to set properly.
Final Touches: Savoring Every Slice
Cutting into this pie feels like unveiling a treasure! Each slice reveals tender apples bathed in caramel-like sweetness topped with that unforgettable crunch—every bite is an experience unto itself. Serve each piece warm or at room temperature alongside a scoop of dairy-free vanilla ice cream or dollop of whipped coconut cream if you’re feeling indulgent. There’s something profoundly satisfying about sharing this dessert with friends or family while reminiscing about old stories—the laughter and chatter merging effortlessly with every mouthful.
And there you have it—a truly extraordinary Easy Dutch Apple Pie that’s not just simple but packed with love and flavors that dance on your palate! I promise you’ll find yourself making this recipe again and again—it may just become part of your cherished traditions in no time! Enjoy every moment spent savoring this delightful creation; after all, cooking is as much about making memories as it is about feeding our souls!
Storage and Enjoyment Tips for Your Easy Dutch Apple Pie
Now that your kitchen is filled with the fragrant aroma of freshly baked Easy Dutch Apple Pie, it’s time to revel in the joy of enjoying this delightful dessert! Whether you’re gathering around the table with loved ones or savoring a quiet moment with a warm slice, this pie has an uncanny ability to bring smiles and warmth. But what happens if you have leftovers? Fear not; I’ve got you covered with some handy storage tips to ensure your pie stays just as delicious for days to come!
Storing Leftover Easy Dutch Apple Pie
To keep your Easy Dutch Apple Pie fresh and scrumptious, simply place it in an airtight container or cover it tightly with plastic wrap. This will keep those luscious flavors and textures intact while preventing any unwanted moisture from sneaking in. You can store it at room temperature for up to two days, but if you want to prolong its life, pop it into the refrigerator where it can stay fresh for about a week. I recommend placing a slice of bread within the container—yes, trust me on this! It absorbs excess moisture, helping maintain that perfect crust texture. When you take a bite after a day or two, you’ll find that the flavors have mingled beautifully, creating an even more harmonious experience. For serving, simply reheat individual slices in the microwave for about 20-30 seconds; this warms them through and revives that delightful buttery aroma without losing any of its magic.
Freezing Easy Dutch Apple Pie for Later
If you’ve baked more than you can eat right away (though I absolutely wouldn’t blame you if you devoured the whole thing!), freezing your Easy Dutch Apple Pie is an excellent option! To freeze properly, let the pie cool completely before wrapping it tightly in plastic wrap followed by aluminum foil to prevent freezer burn. This pie can be stored in the freezer for up to three months—talk about having a show-stopping dessert at your fingertips whenever cravings strike! Whenever you’re ready to indulge again, simply transfer it from the freezer to the fridge to thaw overnight before reheating in the oven at 350°F (175°C) until warmed through (about 20-30 minutes). The beauty of having this treat on hand is that it’s like unearthing a little piece of joy whenever you need it—a warm hug on a chilly evening or an unexpected delight when friends drop by.
With these storage and freezing tips in your back pocket, there’s no reason not to whip up this exceptional pie regularly!
Easy Dutch Apple Pie
- Total Time: 1 hour 35 minutes
- Yield: Serves approximately 8 slices 1x
Description
Experience the warmth and nostalgia of homemade Easy Dutch Apple Pie, where tart Granny Smith apples meet a crumbly brown sugar streusel topping. This delightful dessert is not just about the flavors; it’s a cherished family tradition that brings people together. With its golden-brown crust and tantalizing aroma, this pie will become your go-to recipe for any occasion—whether it’s a holiday feast or a simple weeknight treat. Plus, it’s incredibly easy to make, making it perfect for bakers of all skill levels. Gather around the table and indulge in a slice of comfort that promises to be a hit with everyone!
Ingredients
- 1 unbaked 9-inch pie crust
- 7 cups Granny Smith apples (peeled and thinly sliced)
- 1 cup all-purpose flour
- 1/2 cup granulated sugar
- 1/2 cup lightly packed brown sugar
- 1 teaspoon ground cinnamon
- 1/2 cup softened butter
- 1 tablespoon lemon juice
- 3 tablespoons all-purpose flour (for thickening)
- Pinch of ground nutmeg
Instructions
- Preheat oven to 375°F (190°C).
- Prepare your pie crust in a deep-dish pie pan.
- In a large bowl, mix sliced apples with lemon juice, sugars, flour, cinnamon, salt, and nutmeg until well combined.
- Pour apple filling into the prepared crust.
- In another bowl, combine flour, sugars, and cinnamon for the topping, then cut in softened butter until crumbly.
- Sprinkle the streusel topping over the apple filling evenly.
- Bake for 60-65 minutes until bubbly and golden brown.
- Let cool before slicing.
- Prep Time: 30 minutes
- Cook Time: 65 minutes
- Category: Dessert
- Method: Baking
- Cuisine: American
Nutrition
- Serving Size: 1 slice (approximately 124g)
- Calories: 320
- Sugar: 24g
- Sodium: 150mg
- Fat: 15g
- Saturated Fat: 8g
- Unsaturated Fat: 6g
- Trans Fat: 0g
- Carbohydrates: 45g
- Fiber: 3g
- Protein: 2g
- Cholesterol: 25mg

Leave a Comment